Use vMMIO on Raspberry Pi 4
This example exercises virtual Memory Mapped I/O (vMMIO) using the Raspberry Pi 4 model by demonstrating an external (over the network) handler and a local (Raspberry Pi userspace) driver.
For details read the AVH vMMIO Introduction article.
Creating the VM
To create the VM:
-
Create a Raspberry Pi 4 Virtual Machine. In DEVICES in the menu click on CREATE DEVICE.

-
Click on the RPi VM device then click NEXT.
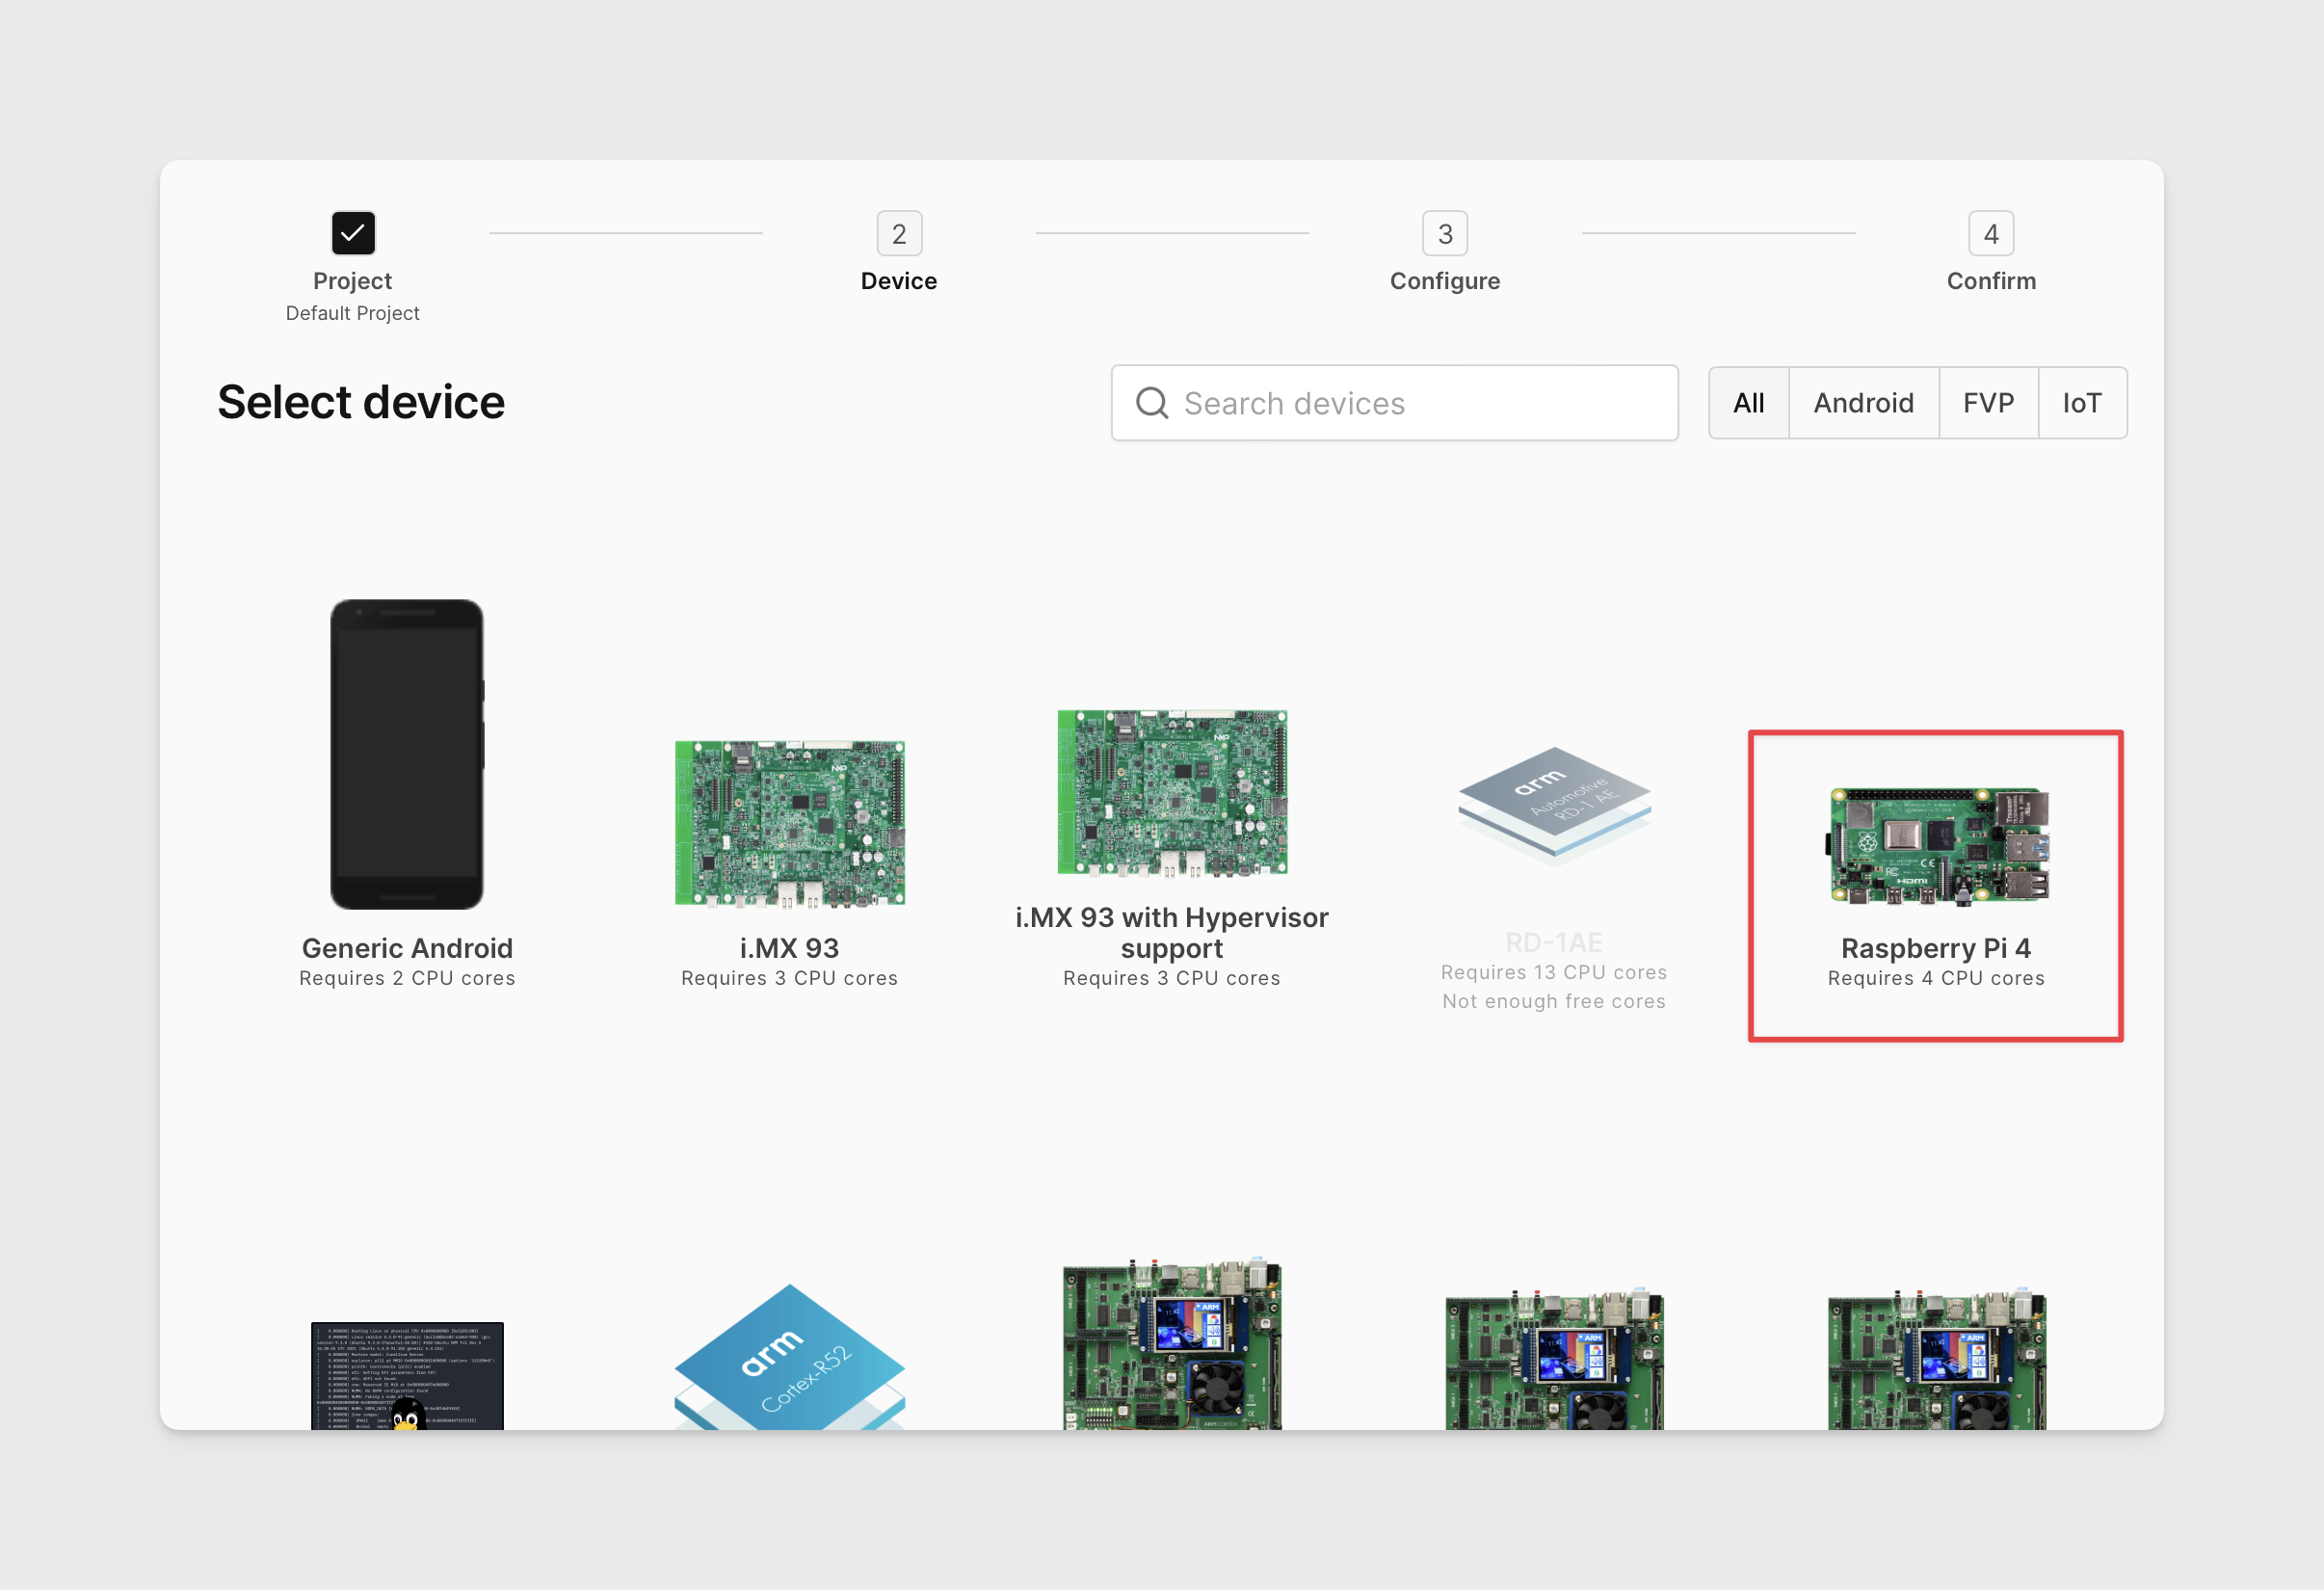
-
Select the
Raspberry Pi OS Litefirmware if not already selected. Then click SELECT.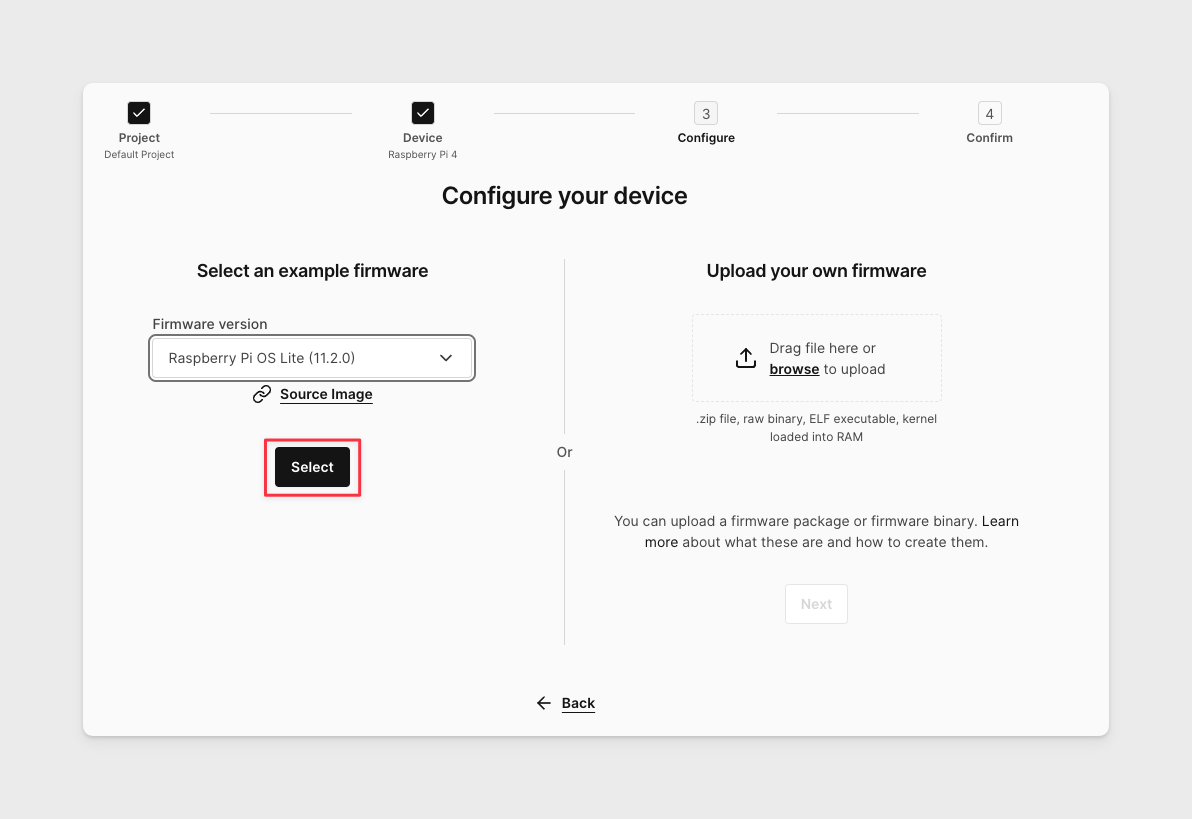
-
Select the "Set advanced boot options ..." checkbox and click CREATE DEVICE.
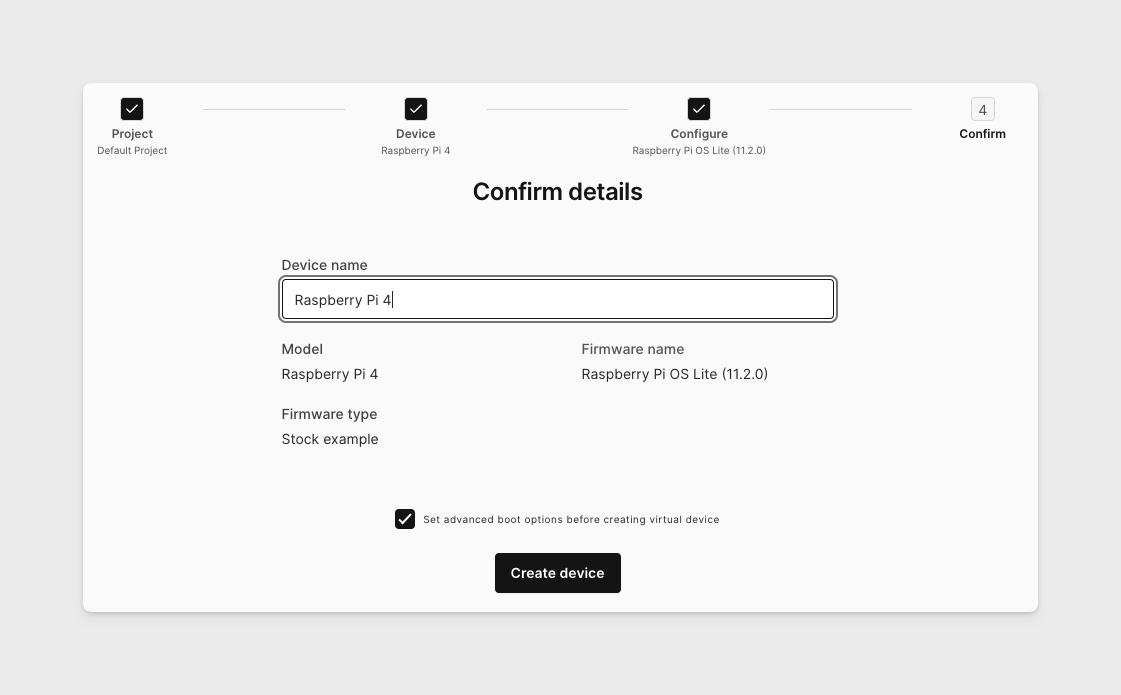
-
Select Custom vMMIO and enter 0xfef00000 for
start, 0x1000 forsizeand 0 forIRQ(not used in this example). Then click CREATE DEVICE one final time.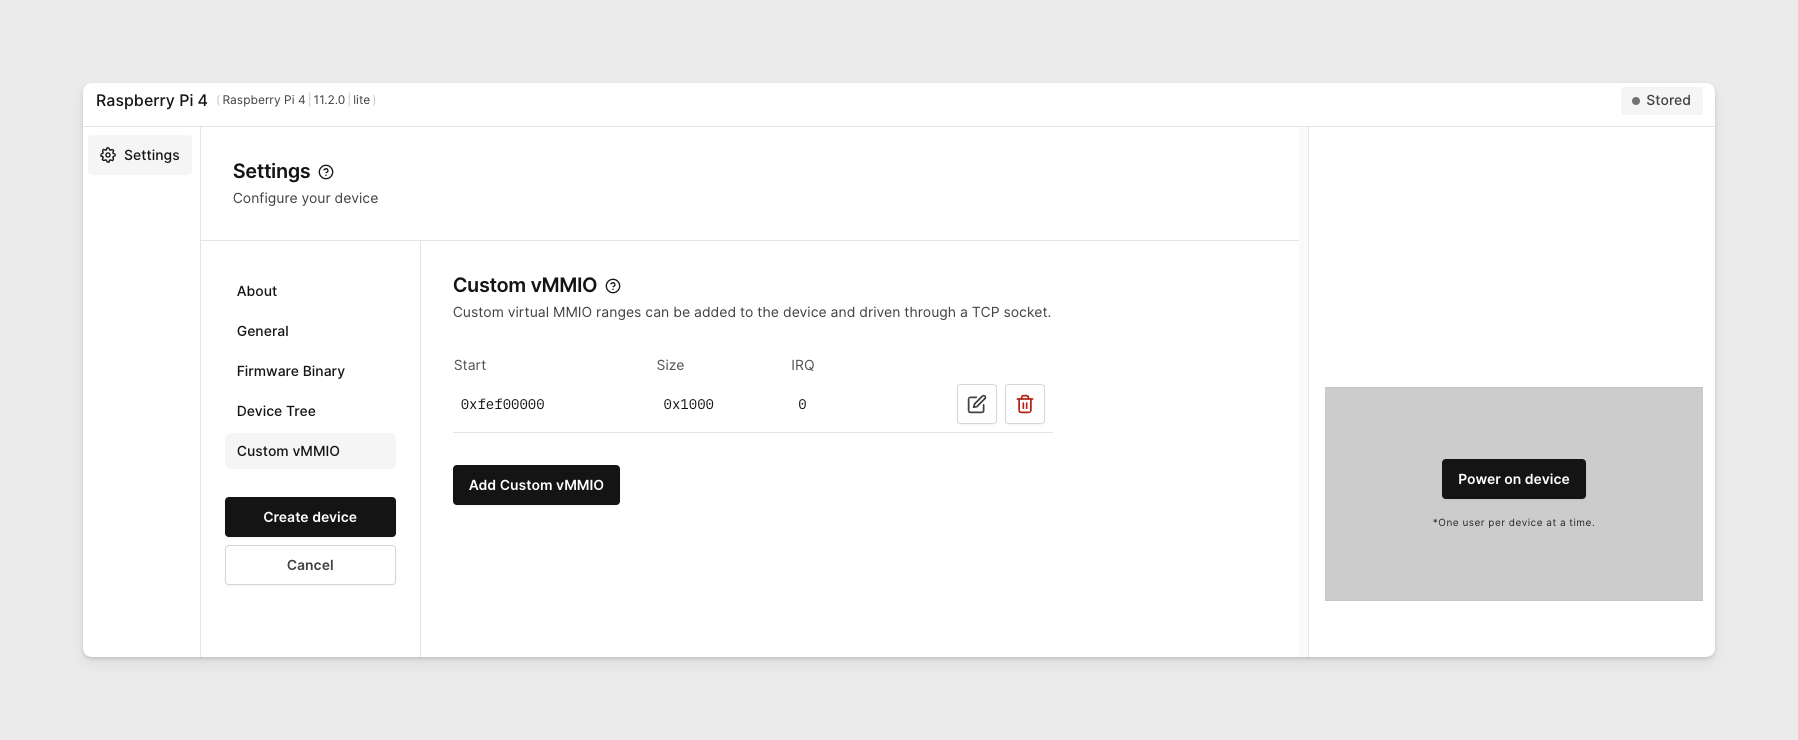 note
note0xfef00000 was selected because the Raspberry Pi hardware does not have anything mapped at this address and as such it is safe to use for our purposes.
-
The device will take a few moments to build. When complete open Console tab and log in using the default credentials of
pi/raspberry.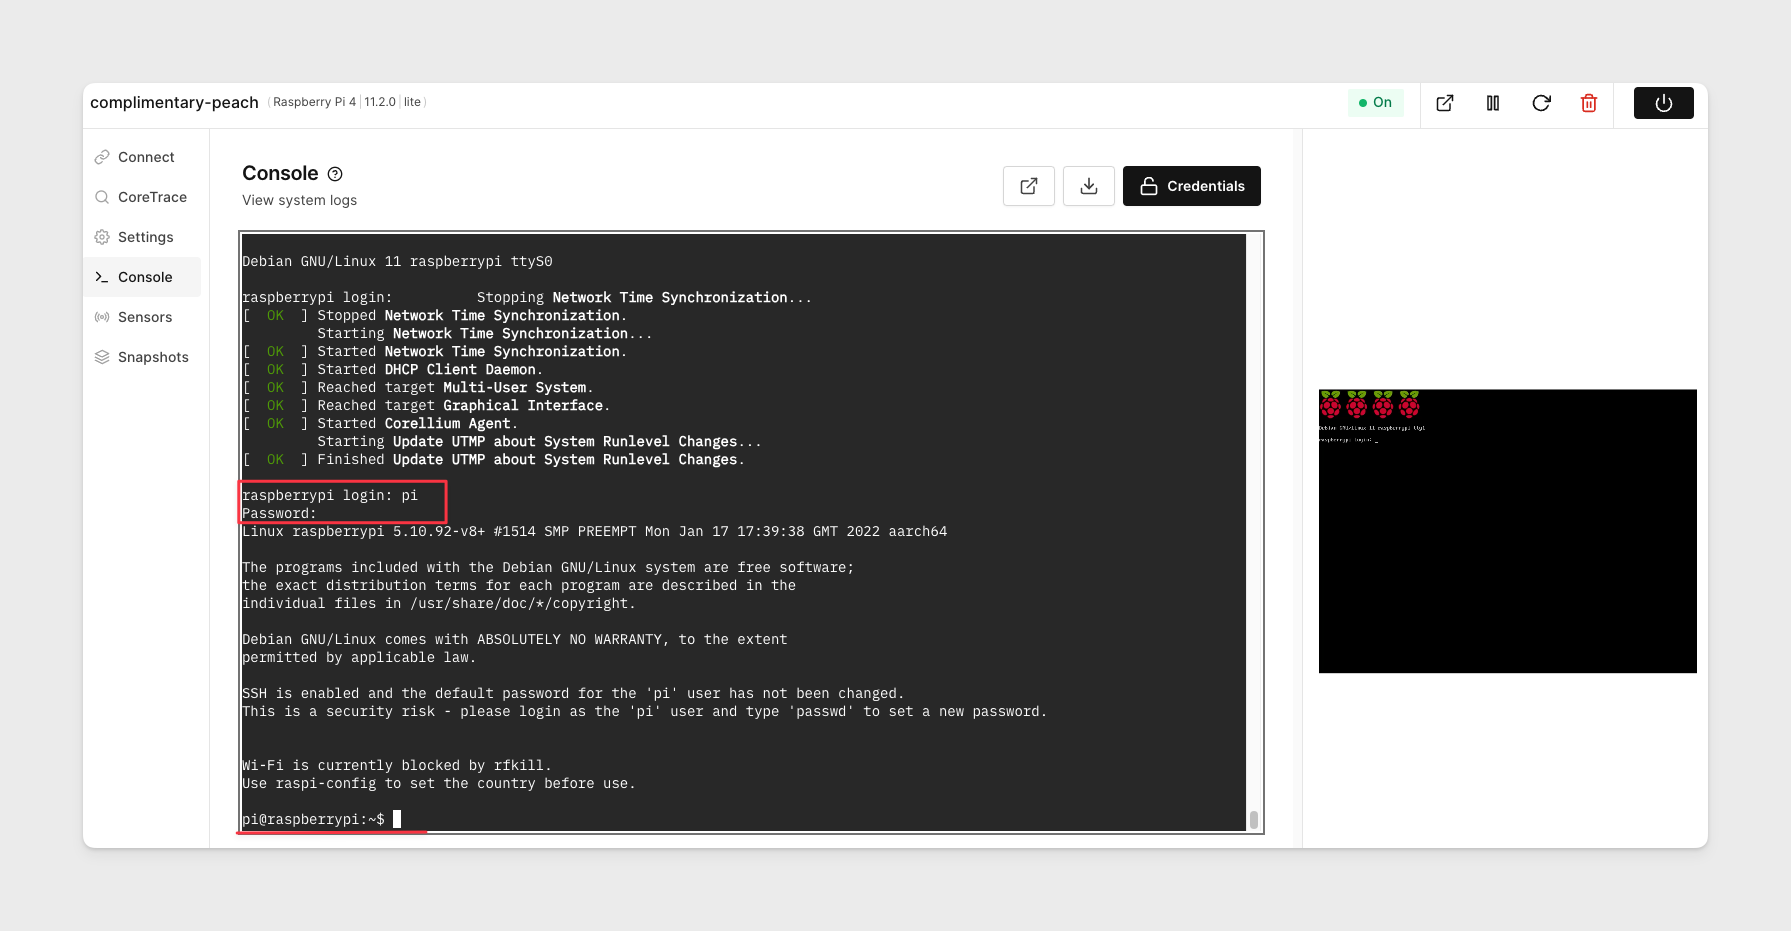
Writing to MMIO Without a vMMIO Handler Registered
To write to MMIO without a vMMIO handler registered:
-
Download project sources to your Raspberry Pi, extract, and build it with the following commands:
pi@raspberrypi:~ $ wget https://support.avh.corellium.com/files/coreio.tar.gz
...

2022-04-12 14:28:55 (18.0 MB/s) - ‘coreio.tar.gz’ saved [23940/23940]

pi@raspberrypi:~ $ tar -xf coreio.tar.gz
pi@raspberrypi:~ $ cd coreio/examples/rpi-test/
pi@raspberrypi:~/coreio/examples/rpi-test $ make
gcc -g -Wall -I../../ -shared -fPIC -o libcoreio.so ../../corehdl-base.c ../../coreio.c
gcc -g -Wall -I../../ -c -o corehdl-base.o ../../corehdl-base.c
gcc -g -Wall -I../../ -c -o coreio.o ../../coreio.c
ar cr libcoreio.a corehdl-base.o coreio.o
gcc -g -Wall -I../../ -ovmmio-test-inside vmmio-test-inside.c
gcc -g -Wall -I../../ -ovmmio-test-outside vmmio-test-outside.c libcoreio.a -
Run the
vmmio-test-insidebuild productThis example source will open
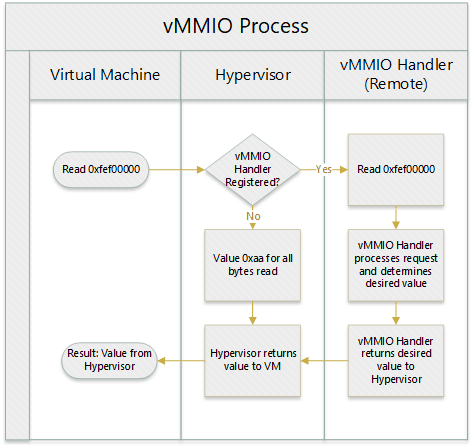
/dev/memat offset 0xfef00000 (recall this is the address of the registered vMMIO) and attempt to read and write to it.However, without any registered vMMIO handlers running, AVH's default behavior, as mentioned earlier, is to return 0xaa in the registers receiving the read contents.
$ sudo ./vmmio-test-inside
0: 0xaa
1: 0xaa
2: 0xaa
3: 0xaa
...
0: 0xaaaa
1: 0xaaaa
2: 0xaaaa
3: 0xaaaa
...
0: 0xaaaaaaaa
1: 0xaaaaaaaa
2: 0xaaaaaaaa
3: 0xaaaaaaaa
...
0: 0xaaaaaaaaaaaaaaaa
1: 0xaaaaaaaaaaaaaaaa
2: 0xaaaaaaaaaaaaaaaa
3: 0xaaaaaaaaaaaaaaaa
In order to implement something more meaningful we need to handle those read and write requests by registering a handler
Writing to MMIO With a vMMIO Handler Registered
To write to MMIO with a vMMIO handler registered:
-
Download project sources to your local machine, extract, and build it.
$ wget https://support.avh.corellium.com/files/coreio.tar.gz
...

2022-04-12 14:28:55 (18.0 MB/s) - ‘coreio.tar.gz’ saved [23940/23940]

$ tar -xf coreio.tar.gz
$ cd coreio/examples/rpi-test/
$ make
gcc -g -Wall -I../../ -shared -fPIC -o libcoreio.so ../../corehdl-base.c ../../coreio.c
gcc -g -Wall -I../../ -c -o corehdl-base.o ../../corehdl-base.c
gcc -g -Wall -I../../ -c -o coreio.o ../../coreio.c
ar cr libcoreio.a corehdl-base.o coreio.o
gcc -g -Wall -I../../ -ovmmio-test-inside vmmio-test-inside.c
gcc -g -Wall -I../../ -ovmmio-test-outside vmmio-test-outside.c libcoreio.a -
Run the
vmmio-test-outsidebuild product, targeting the Services IP of the VM and vMMIO port (4300) as argumentsnoteThis step registers the vMMIO handler, overriding the default behavior just observed.
$ ./vmmio-test-outside 10.11.1.1:4300
tick
tick
tick
... -
Re-run
vmmio-test-insidewithin the Raspberry Pi VM. Observe that thevmmio-test-outsidebinary will now emit state information for each read and write event happening inside the VM byvmmio-test-inside.$ ./vmmio-test-outside 10.11.1.1:4300
tick
tick
tick
write fef00000 1 0000000000000000 0
write fef00001 1 0000000000000001 0
write fef00002 1 0000000000000002 0
write fef00003 1 0000000000000003 0
write fef00004 1 0000000000000004 0
write fef00005 1 0000000000000005 0
write fef00006 1 0000000000000006 0
tick
write fef00007 1 0000000000000007 0
write fef00008 1 0000000000000008 0
...Meanwhile
vmmio-test-insidewill emit the contents it reads from the MMIO address after attempting to modify its contents with a write.$ sudo ./vmmio-test-inside
0: 0x00
1: 0x01
2: 0x02
3: 0x03
...
0: 0x0100
1: 0x0201
2: 0x0302
3: 0x0403
...
0: 0x03020100
1: 0x04030201
2: 0x05040302
3: 0x06050403
...
0: 0x0706050403020100
1: 0x0807060504030201
2: 0x0908070605040302
3: 0x0a09080706050403
Flow Diagram
The flow followed in this example is illustrated below. The Writing to MMIO Without a vMMIO Handler Registered example follows the "vMMIO Handler Registered" No path while the Writing to MMIO With a vMMIO Handler Registered example has a remote handler registered and follows the Yes path.
Summary
In summary, vmmio-test-outside is registering as an vMMIO read and write handler for a specified address range within the VM. When the physical address range specified is read from or written to, this handler receives a callback allowing it to handle the request. In this example, the vmmio-test-inside binary opened /dev/mem and simulates the OS or some other entity reading or writing to physical memory in order to exercise the callbacks in the registered vMMIO handler.