Connect to BLE on Raspberry Pi 4
Learn how to use Bluetooth Low Energy (BLE) on a virtual Raspberry Pi 4 and Android devices.
In this guide, we show how to communicate between two virtual Raspberry Pi 4 virtual boards as well as between a virtual Raspberry Pi 4 board and a virtual Android device.
Use BLE Between Two Raspberry Pi Devices
In this example, we will set up a Raspberry Pi 4 BLE Node and a Raspberry Pi 4 BLE Master.
Set Up the Raspberry Pi 4 BLE Node
To set up the Raspberry Pi 4 BLE node, do the following:
-
Create a Raspberry Pi 4 device. In this example we will use the "lite" stock firmware, and name the device "RPi-RPi BLE Node". After device is created, log in using the default credentials
(pi/raspberry). Quickstart for Raspberry Pi 4 explains this step in more details.
-
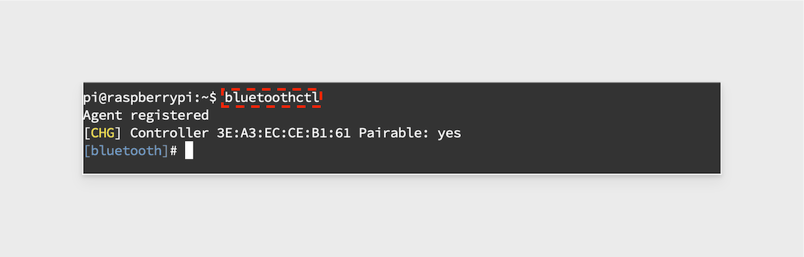
Open the Bluetooth control tool.
bluetoothctl
-
Turn on Bluetooth.
power on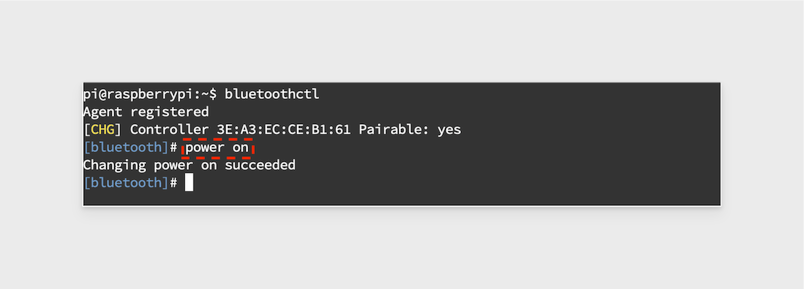
-
Open the advertise menu.
menu advertise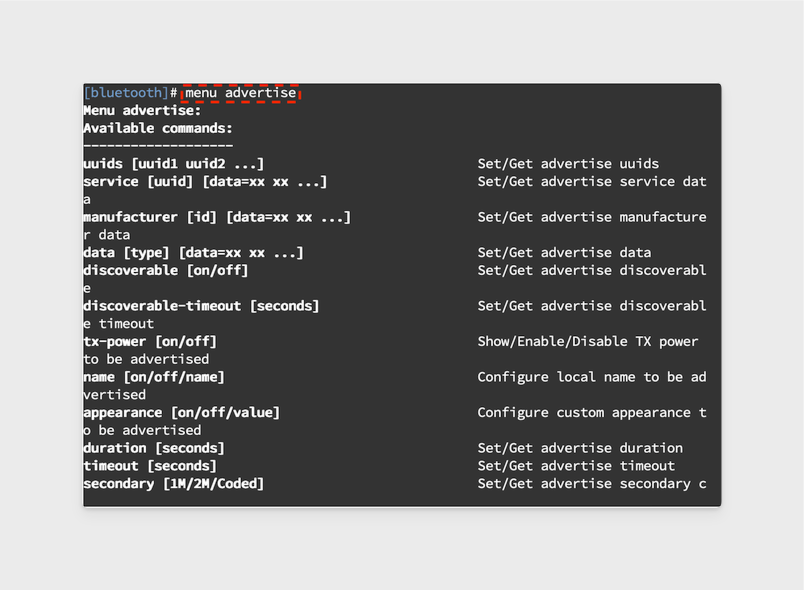
-
Set the manufacturer to 0xffff 0x12 0x34 then read back the values.
manufacturer 0xffff 0x12 0x34manufacturer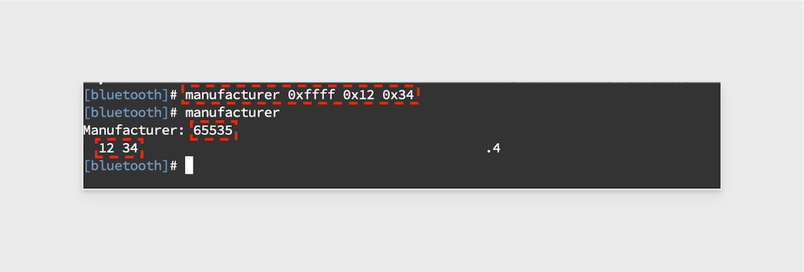
-
Set the name to
avh-demo-1then read back the value.name avh-demo-1name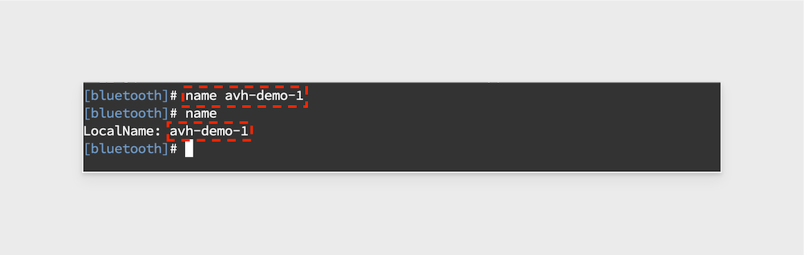
-
Go back to the main menu.
back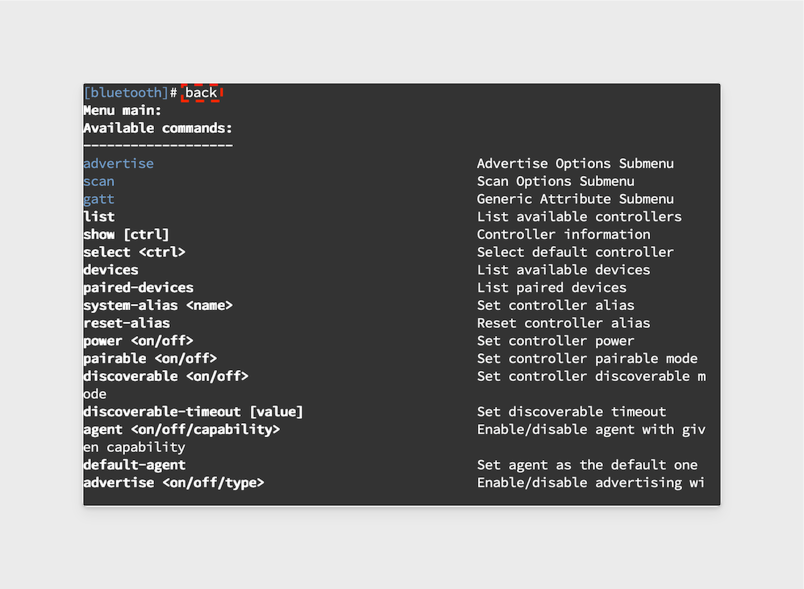
-
Open the generic attributes menu.
menu gatt
-
Register a new service. At the prompt, enter
yes.register-service e2d36f99-8909-4136-9a49-d825508b297b
-
Register a new read-only characteristic. In our example, we will enter
07at the prompt.register-characteristic 0x1234 read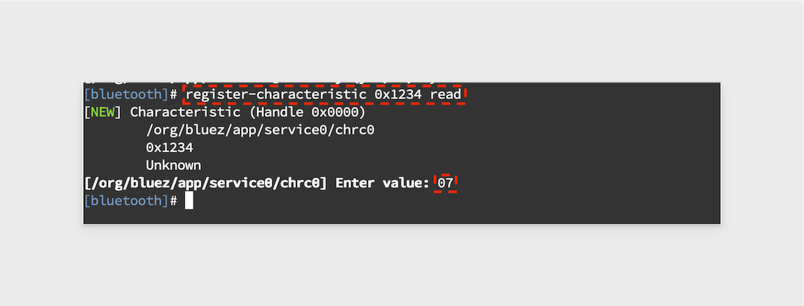
-
Register a new read-write characteristic. In our example, we will enter
13at the prompt.register-characteristic 0x5678 read,write
-
Register the application. You should see a response
Application Registered.register-application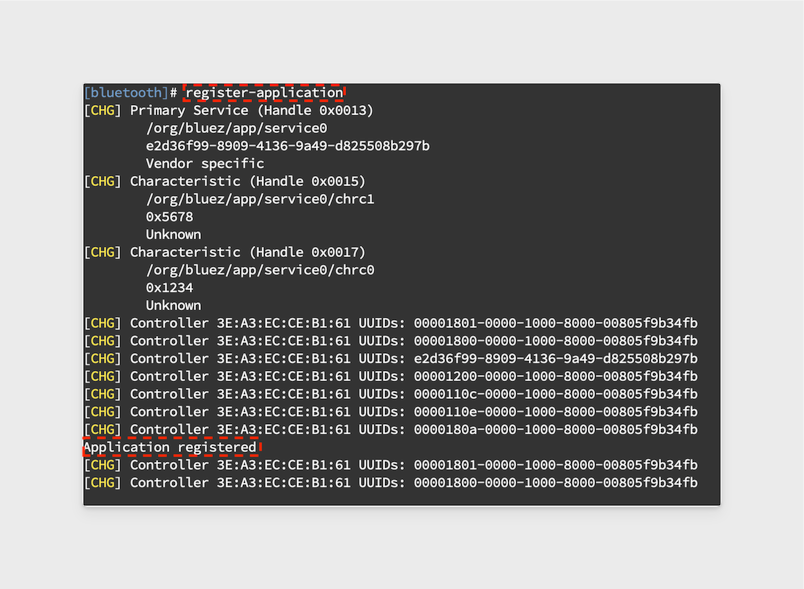
-
Go back to the main menu again.
back -
Turn on advertising.
advertise on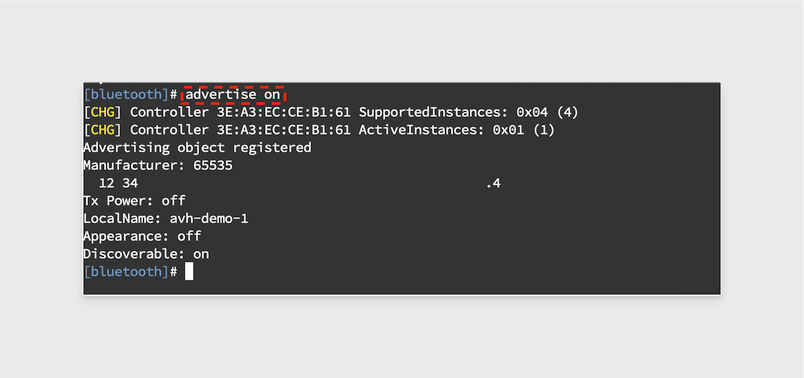
-
Your Bluetooth node is now set up. Proceed to the next step to connect to this node using a second Raspberry Pi 4 board.
Connect to the Node with the Raspberry Pi 4 BLE Master
To connect to the node with the Raspberry Pi 4 BLE master, do the following:
-
Create a new Raspberry Pi 4 instance using the lite firmware. In our example, we will use the name "RPi-RPi BLE Master".
-
Open the Bluetooth control tool.
bluetoothctl -
Turn on Bluetooth.
power on -
Scan for Bluetooth devices.
scan on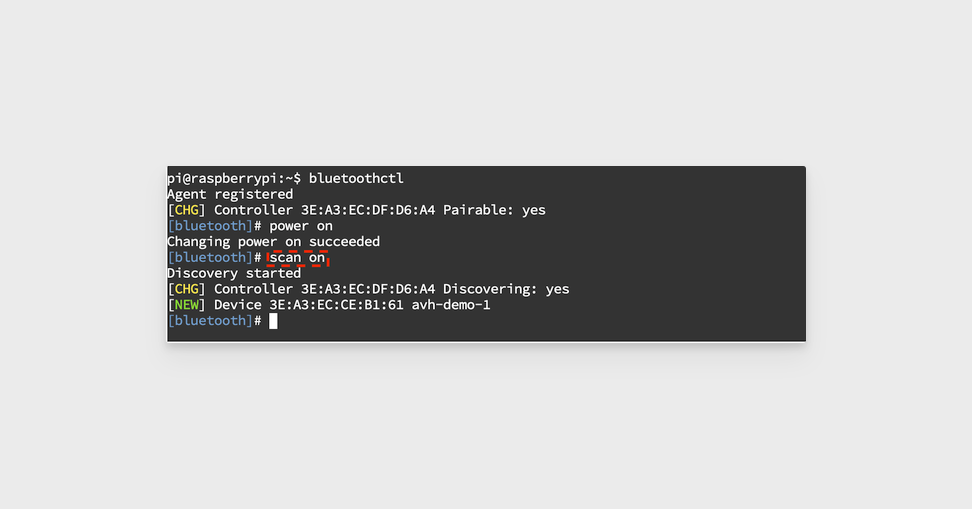
-
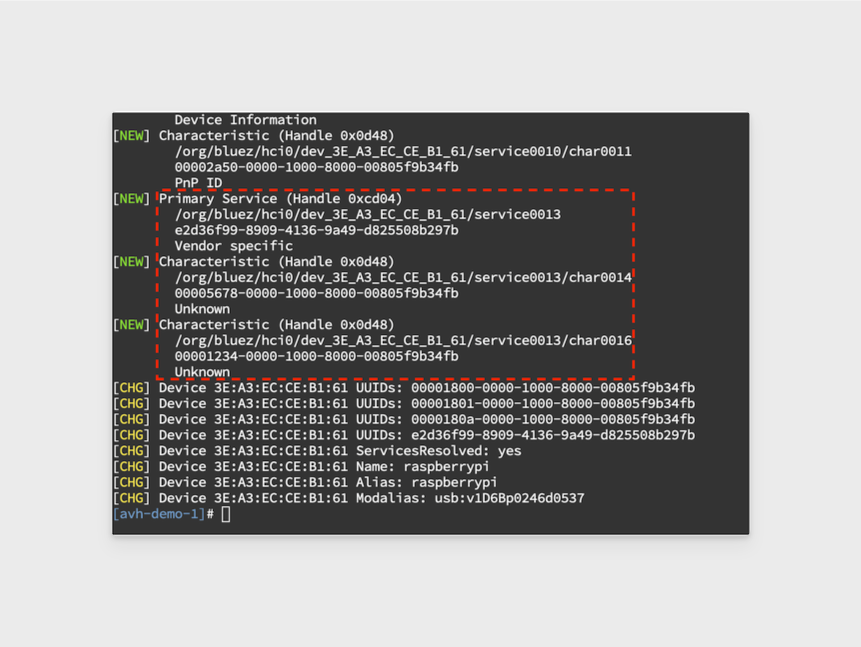
Connect to the
avh-demo-1device. Make note of the two IDs starting with00001234and00005678, referring to the custom characteristics that you set up.connect 3E:A3:EC:CE:B1:61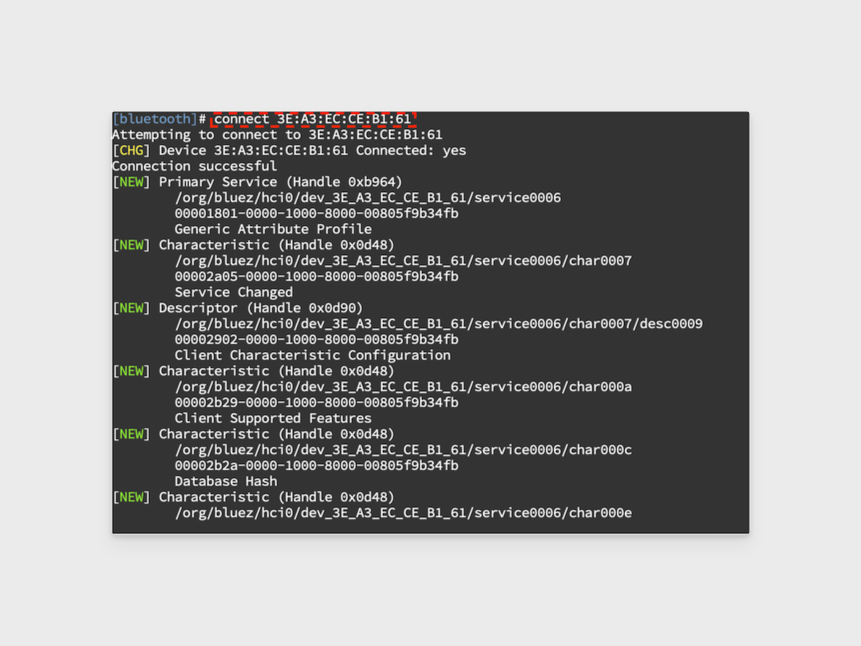
-
Open the generic attributes menu.
menu gatt -
Select the read-only attribute with an ID starting with
00001234. The prompt should change to the appropriate characteristic.select-attribute 00001234-0000-1000-8000-00805f9b34fb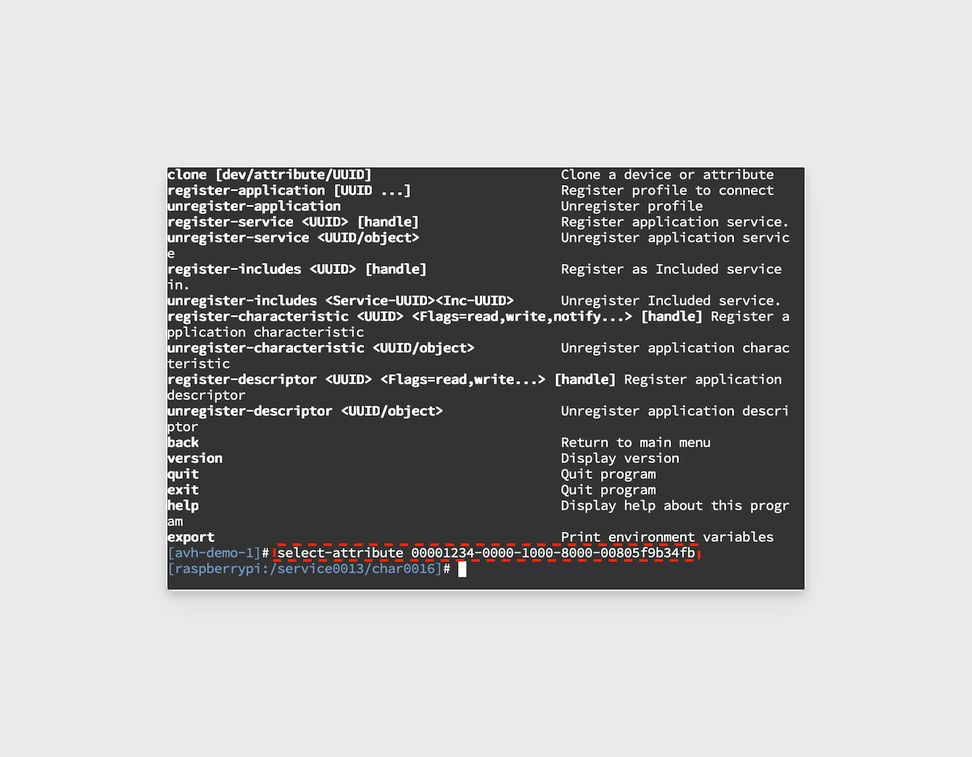
-
Read the value. You should see the value you set previously, represented in hexidecimal.
read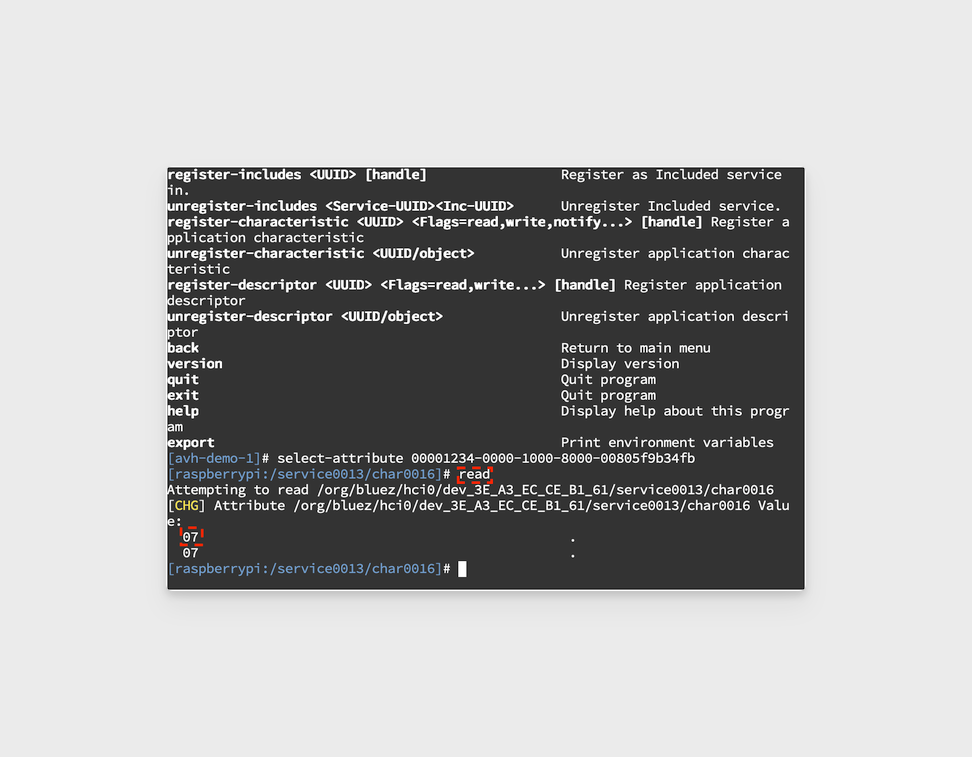
-
Attempt to write a new value. You should see an error because the characteristic is read-only.
write 1234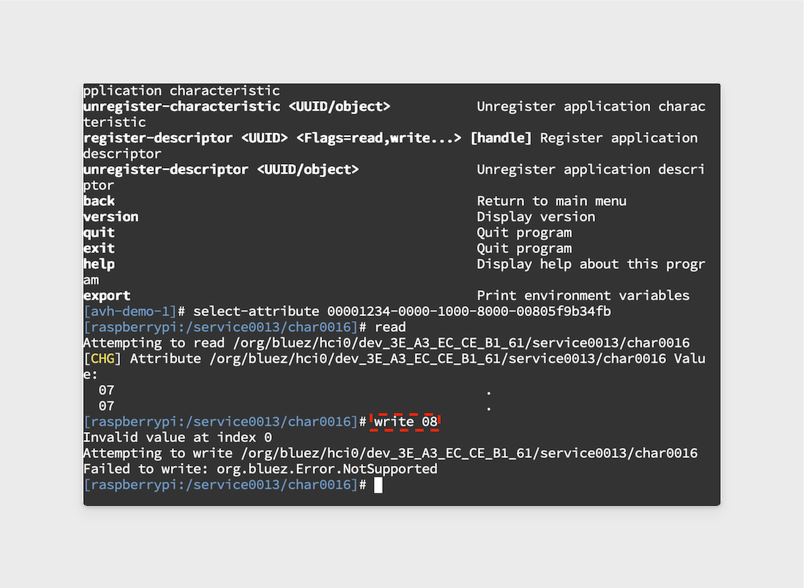
-
Select the read-write characteristic with an ID starting with
00005678. The prompt should change to the appropriate characteristic.select-attribute 00005678-0000-1000-8000-00805f9b34fb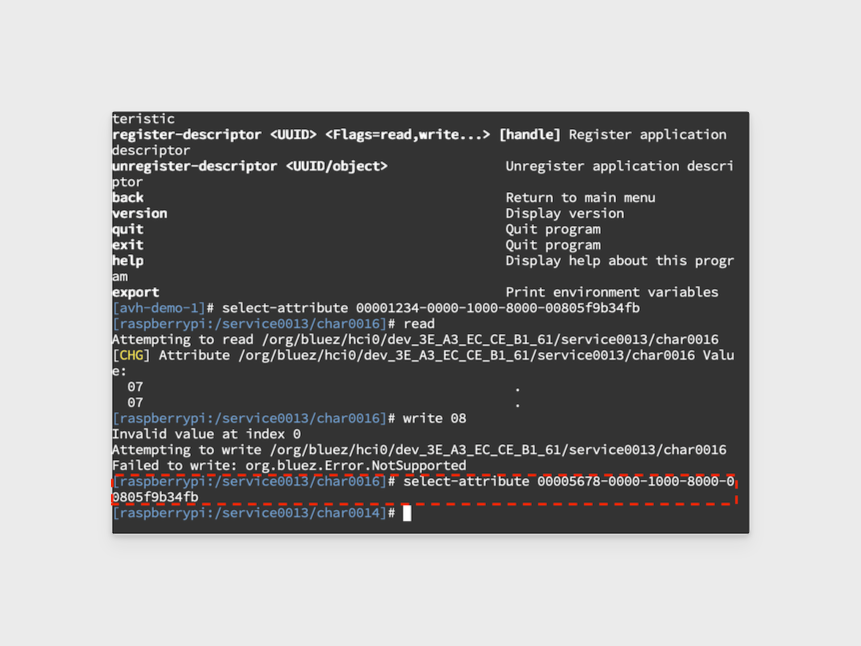
-
Read the value. You should see the value you set previously, represented in hexidecimal.
read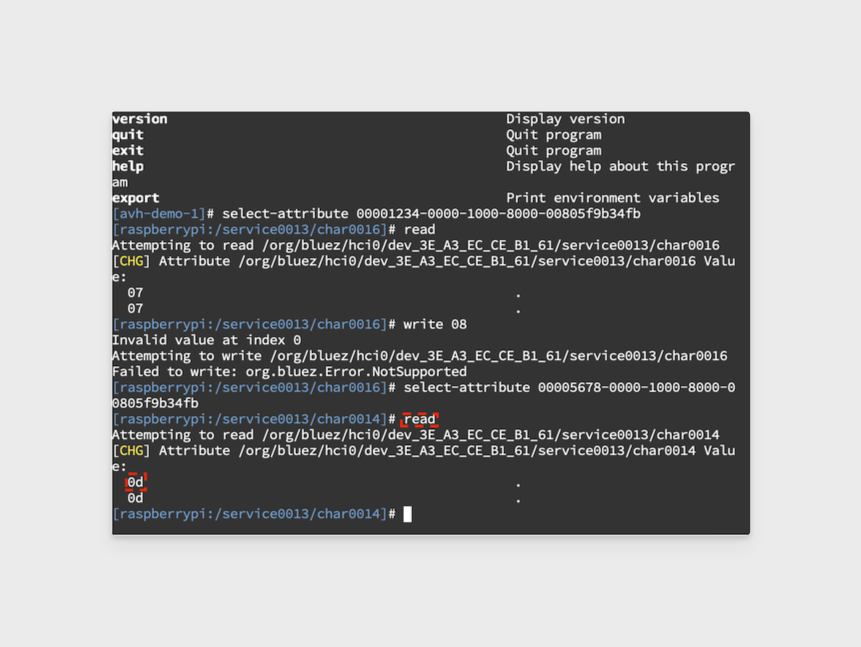
-
Write a new value then read it back. In our example, we will use
14, which is0din hexidecimal.write 14read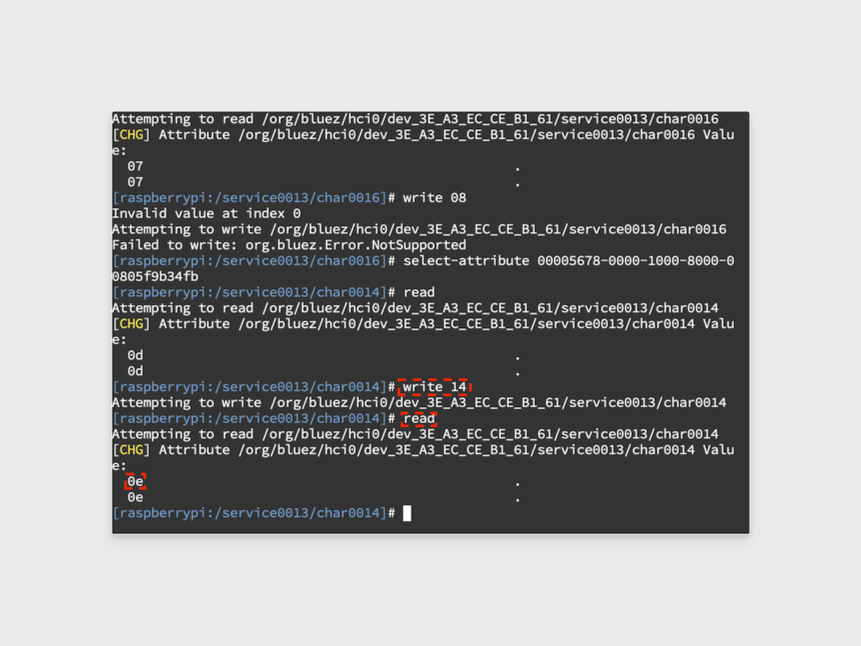
Use BLE Between a Raspberry Pi 4 Board and an Android Device
In this example, we will set up a Raspberry Pi 4 BLE Node and an Android BLE Master.
Set Up the Raspberry Pi 4 BLE Node
To set up the Raspberry Pi 4 BLE node, do the following:
-
Create a new Raspberry Pi 4 board. In our example, we will use the name "RPi-Android BLE Node".
-
Follow the steps in the previous section to set up a Raspberry Pi BLE Node. For our example, we will set the name of the Bluetooth node to "avh-demo-2".
bluetoothctlpower onmenu advertisemanufacturer 0xffff 0x12 0x34name avh-demo-2backmenu gattregister-service e2d36f99-8909-4136-9a49-d825508b297byesregister-characteristic 0x1234 read07register-characteristic 0x5678 read,write13register-applicationbackadvertise on -
When the node is advertising, make note of the node's MAC address on the first line of the response (
3E:A3:EC:AE:72:9Ain our example).
Connect to the Node with the Android BLE Master
To connect to the node with the Android BLE master, do the following:
-
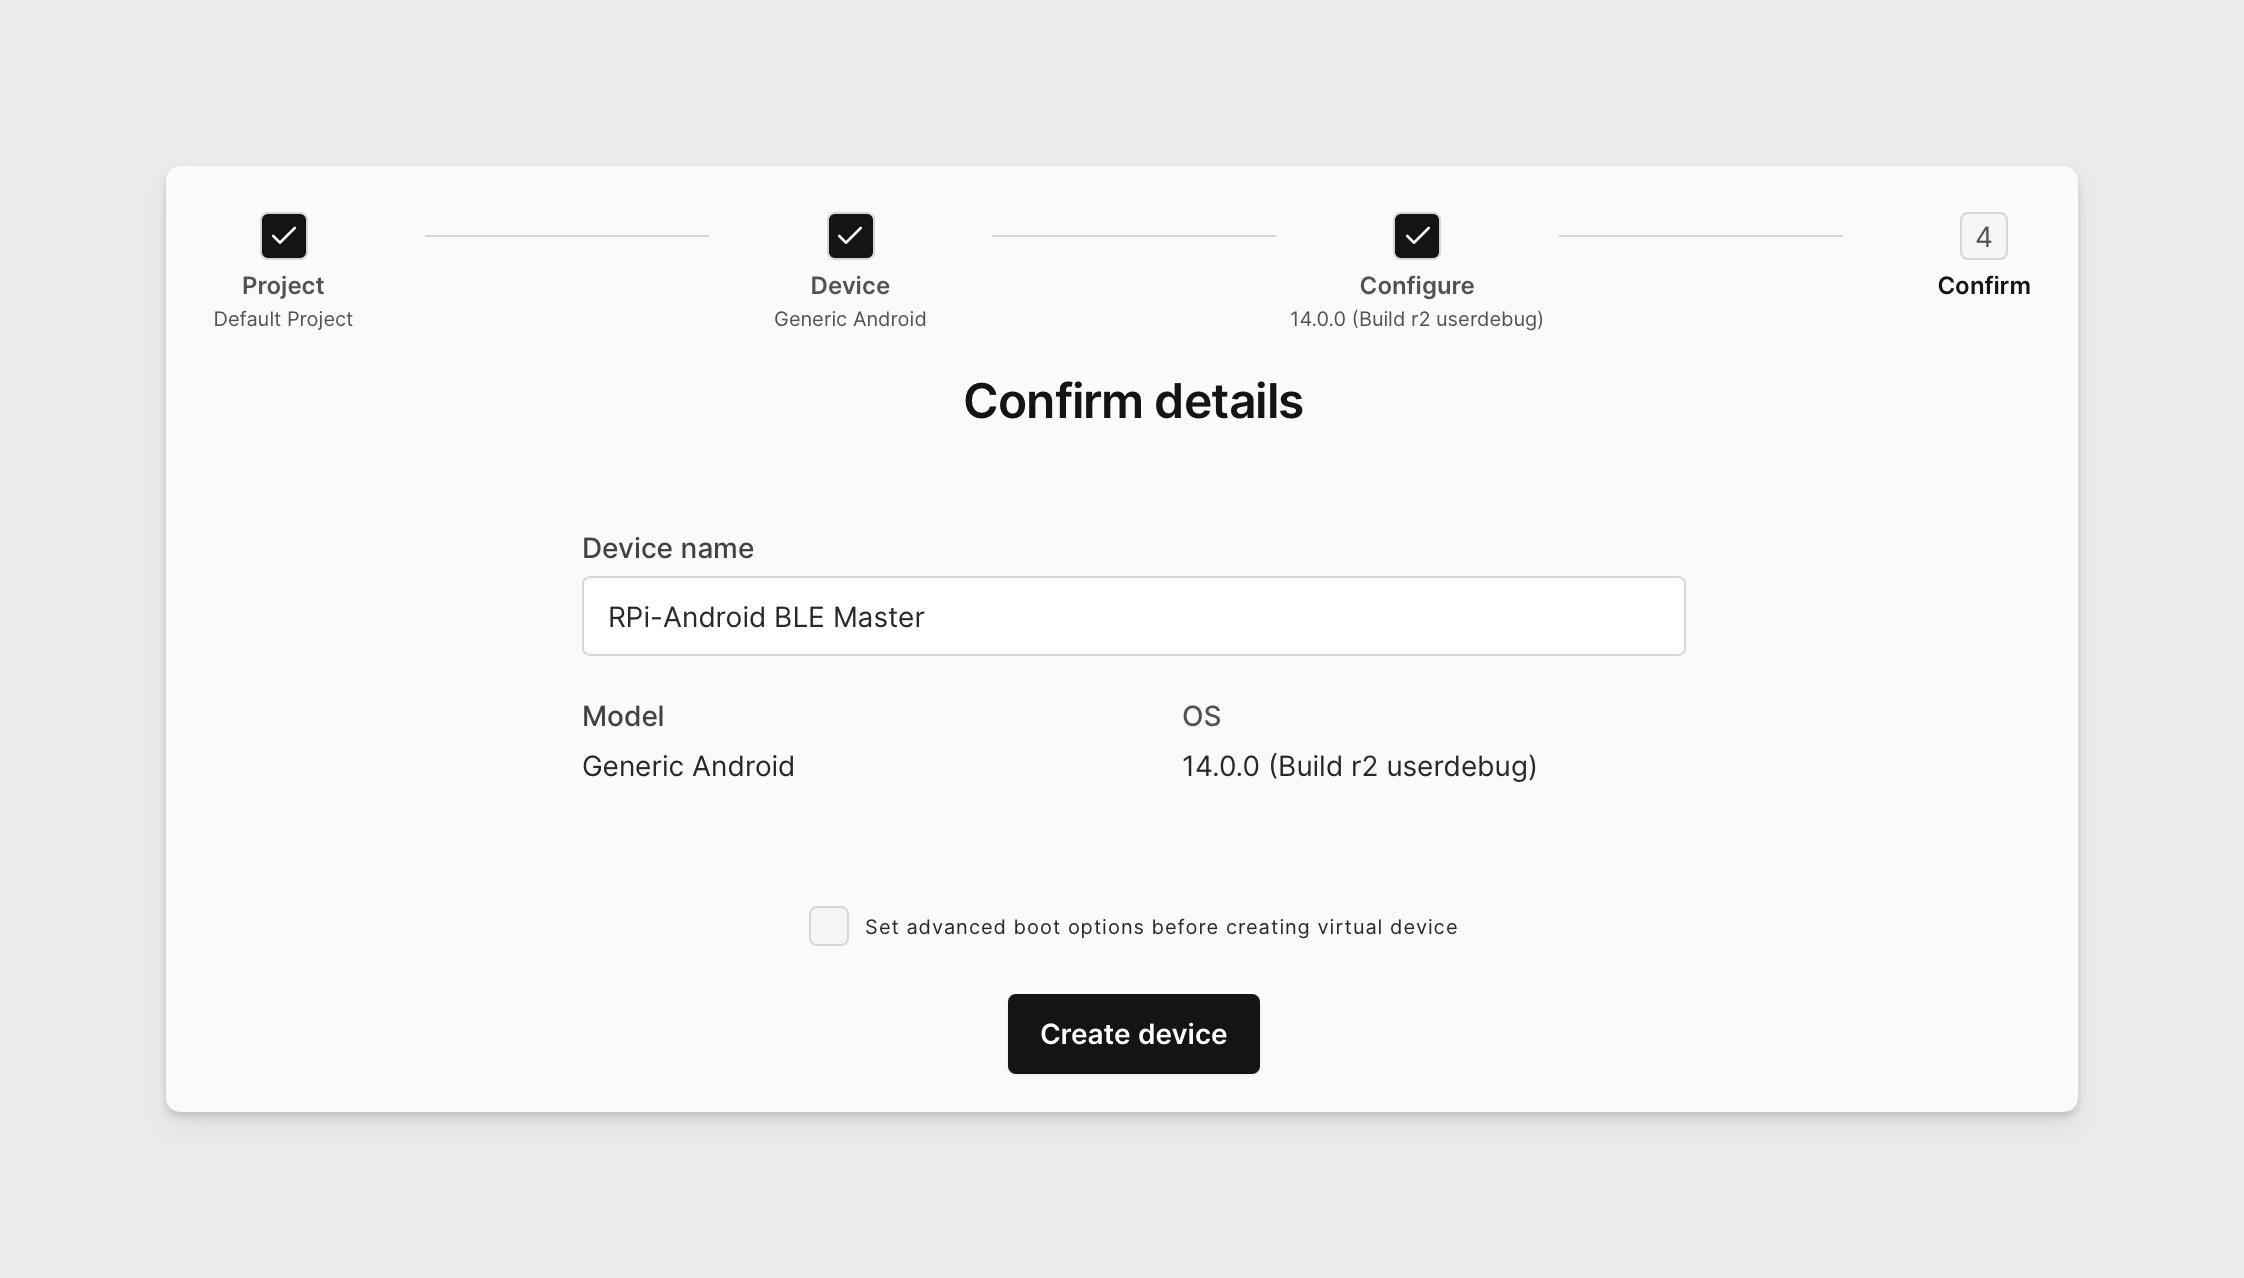
Create a new Android device running firmware 12.0.0. For our example, we will use the name "RPi-Android BLE Master".
-
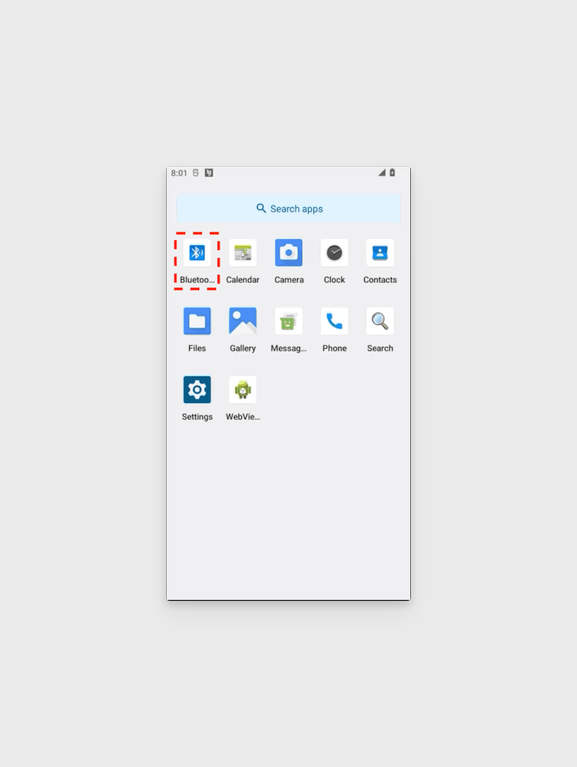
Download the Bluetooth LE Scanner APK to your local computer then install the APK through the Apps tab.
-
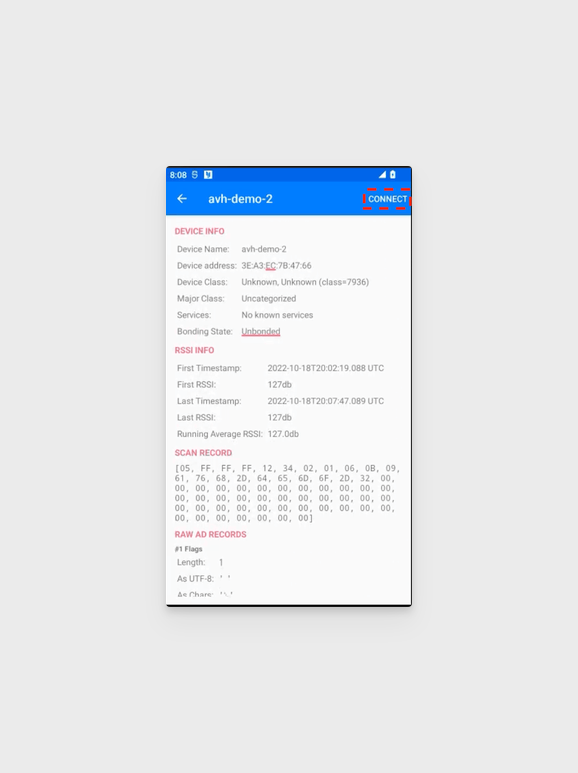
Open the Bluetooth LE Scanner app and click Scan. You should see
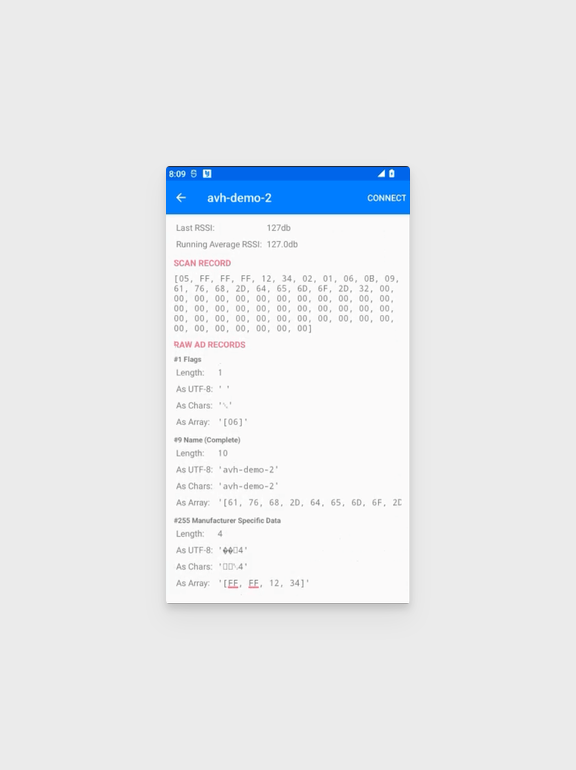
avh-demo-2appear with the matching MAC address.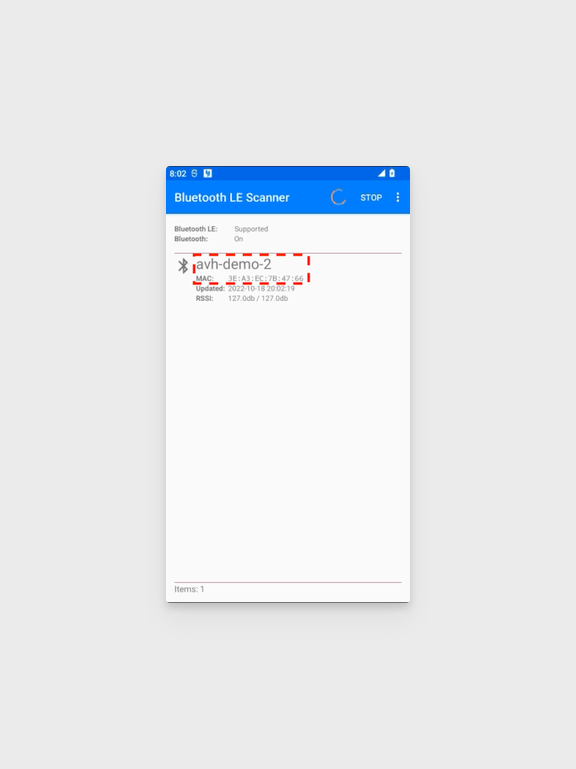
-
Click on avh-demo-2 to open up additional details. Scroll to the bottom of the page to see the manufacturer
[ff, ff, 12, 34]we set previously.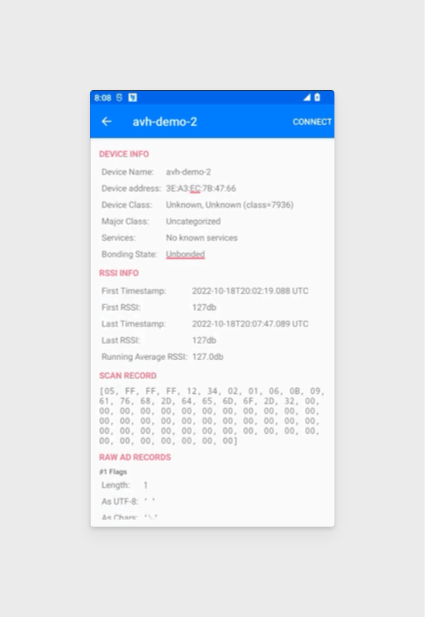
-
Click the CONNECT button in the Android app.
-
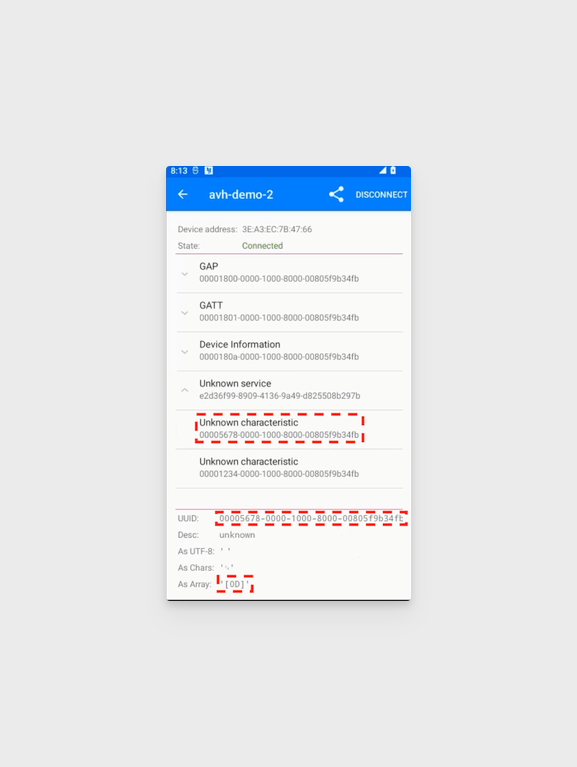
After the device connects successfully, you will see an
Unknown Servicewith the ID matching what we set up. Expand the service.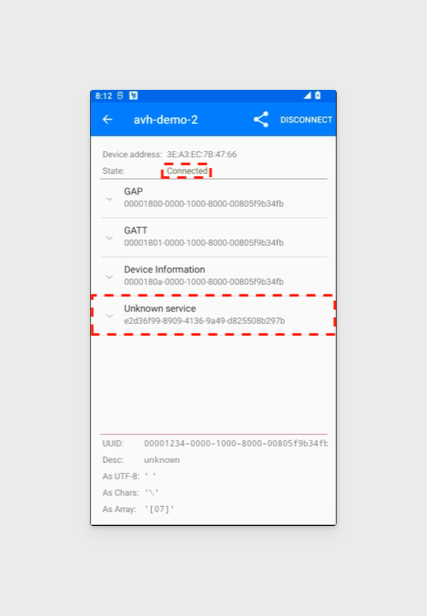
-
You will see the two custom characteristics
1234and5678that we set up.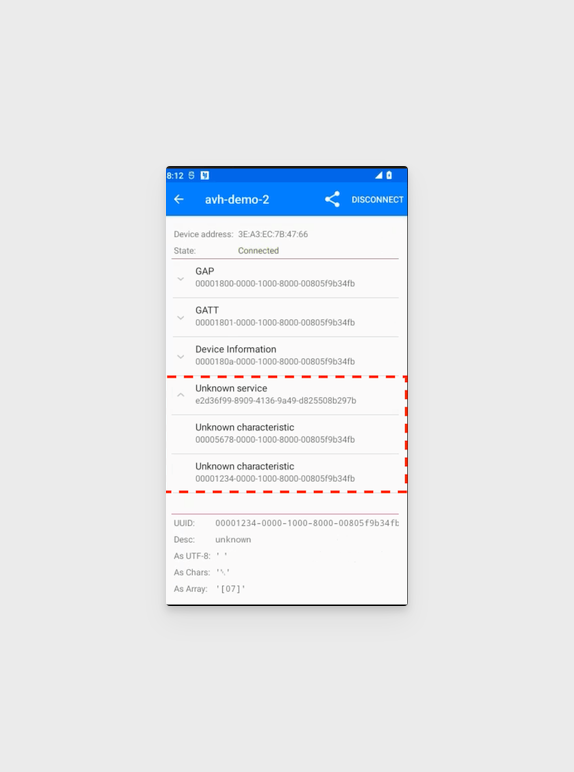
-
Click on the
1234and the5678services to see the values we had set previously (07and0d, respectively).