Building Stock RD-1AE Images
The RD-1AE automotive solution from Arm has an extensive set of software and documentation provided by Arm. This document will cover the steps needed to build and run these software images on Arm Virtual Hardware powered by Corellium.
Note that the RD-1AE model contains all of the stock firmware already and you can choose which software package to run by using the pulldown menu for Firmware version when you create the device.
For more information on the Arm software packages for the RD-1AE, refer to the Arm Automotive Solutions webpage.
The terms RD-1AE and Kronos are used interchangeably by Arm, as Kronos was originally the codename for the device as it was being developed.
Build your image
To build your own version of the stock firmware, follow these steps:
-
Follow the Ubuntu instructions on this Yocto documentation page to install dependencies.
-
Install additional dependencies.
sudo apt install -y python3-newt tmux
sudo -H pip3 install --upgrade kas==4.3.2 && sudo apt install python3-newt -
Clone the repository with tmux.
tmux new-session -s rd-1ae
tmux attach -t rd-1ae
mkdir -p $HOME/rd-1ae
cd $HOME/rd-1ae
git clone https://git.gitlab.arm.com/automotive-and-industrial/arm-auto-solutions/sw-ref-stack.git --branch v1.1.1 -
Apply the following patch to add more RAM, USB XHCI, and a framebuffer device.
diff --git a/yocto/meta-arm-bsp-extras/recipes-bsp/trusted-firmware-a/files/fvp-rd-kronos/rdkronos.dts b/yocto/meta-arm-bsp-extras/recipes-bsp/trusted-firmware-a/files/fvp-rd-kronos/rdkronos.dts
index 65ff67b..67dd3b2 100644
--- a/yocto/meta-arm-bsp-extras/recipes-bsp/trusted-firmware-a/files/fvp-rd-kronos/rdkronos.dts
+++ b/yocto/meta-arm-bsp-extras/recipes-bsp/trusted-firmware-a/files/fvp-rd-kronos/rdkronos.dts
@@ -604,7 +604,7 @@
                 * 0x7fbf 0000 - 0x7fbf ffff : FFA_SHARED_MM_BUF
                 */
                reg = <0x00000000 0x80000000 0 0x7fbf0000>,
-                         <0x00000080 0x80000000 0 0x80000000>;
+              <0x00000080 0x80000000 0x00000003 0x80000000>;
        };

        reserved-memory {
@@ -721,6 +721,21 @@
                #size-cells = <2>;
                ranges;

+        xhci@10000000 {
+            compatible = "generic-xhci";
+            reg = <0 0x10000000 0 0x10000>;
+            interrupts = <0x00 0x33 0x04>;
+        };
+
+        framebuffer@b000000000 {
+            compatible = "simple-framebuffer";
+            reg = <0xb0 0x0 0x0 (1920*1080*4)>;
+            width = <1920>;
+            height = <1080>;
+            stride = <(1920*4)>;
+            format = "a8b8g8r8";
+        };
+
                timer@2a810000 {
                        compatible = "arm,armv7-timer-mem";
reg = <0x0 0x2a810000 0 0x10000>; -
Apply the following patch to build drivers for the framebuffer device.
diff --git a/yocto/meta-arm-bsp-extras/recipes-kernel/linux/arm-platforms-extra-kmeta/bsp/arm-platforms-extra/fvp-rd-kronos.cfg b/yocto/meta-arm-bsp-extras/recipes-kernel/linux/arm-platforms-extra-kmeta/bsp/arm-platforms-extra/fvp-rd-kronos.cfg
index c75d99b..9f98e23 100644
--- a/yocto/meta-arm-bsp-extras/recipes-kernel/linux/arm-platforms-extra-kmeta/bsp/arm-platforms-extra/fvp-rd-kronos.cfg
+++ b/yocto/meta-arm-bsp-extras/recipes-kernel/linux/arm-platforms-extra-kmeta/bsp/arm-platforms-extra/fvp-rd-kronos.cfg
@@ -24,3 +24,21 @@ CONFIG_MMC_ARMMMCI=y
# OP-TEE
CONFIG_TEE=y
CONFIG_OPTEE=y
+
+#Framebuffer
+CONFIG_FB=y
+CONFIG_FB_SIMPLE=y
+
+#For mousekeyboard
+CONFIG_USB_COMMON=y
+CONFIG_USB_HID=y
+CONFIG_USB=y
+
+CONFIG_USB_XHCI_HCD=y
+CONFIG_USB_XHCI_PCI=y
+CONFIG_USB_XHCI_PLATFORM=y
+
+CONFIG_USB_DEFAULT_PERSIST=y
+CONFIG_USB_AUTOSUSPEND_DELAY=2
+
+CONFIG_USB_NET_DRIVERS=y -
Apply the following patch to disable PCI passthrough of an unmodeled AHCI PCI device. This is relevant only for the virtualization firmware targets.
diff --git a/yocto/meta-arm-auto-solutions/recipes-core/domu-package/domu-envs.inc b/yocto/meta-arm-auto-solutions/recipes-core/domu-package/domu-envs.inc
index 56ec5a5..b4ebbf9 100644
--- a/yocto/meta-arm-auto-solutions/recipes-core/domu-package/domu-envs.inc
+++ b/yocto/meta-arm-auto-solutions/recipes-core/domu-package/domu-envs.inc
@@ -35,7 +35,7 @@ DOMU1_NUMBER_OF_CPUS ?= "2"
 DOMU1_VCPU_PIN ?= "cpus = [\"1\", \"2\"]"
 DOMU1_MPAM ?= "mpam = [\"slc=0xc0\"]"
 DOMU1_SVE ?= "sve = \"${DOMU_SVE_SETTING}\""
-DOMU1_PCI_PASSTHROUGH ?= "pci = [\"${DOMU1_PCI_ID}\"]"
+DOMU1_PCI_PASSTHROUGH ?= ""
 DOMU1_EXTRA ?= "${DOMU1_BRIDGES}\\n${DOMU1_VCPU_PIN}\\n${DOMU1_MPAM}\\n${DOMU1_SVE}\\n${DOMU1_PCI_PASSTHROUGH}\\n"

DOMU2_BRIDGES ?= "vif = ['script=vif-openvswitch,bridge=ovsbr0,vifname=domu2.ext0', 'script=vif-openvswitch,bridge=brsi0.100,vifname=domu2.ethsi0', 'script=vif-openvswitch,bridge=brsi1.200,vifname=domu2.ethsi1', 'script=vif-openvswitch,bridge=brsi2.300,vifname=domu2.ethsi2']" -
The default disk size in the reference software build is only 2GB. Apply the following change to
meta-arm-bspto increase the disk size to 32GB.diff --git a/yocto/meta-arm-bsp-extras/wic/fvp-rd-kronos-efi-disk.wks.in b/yocto/meta-arm-bsp-extras/wic/fvp-rd-kronos-efi-disk.wks.in
index 442fc8f..6dc255c 100644
--- a/yocto/meta-arm-bsp-extras/wic/fvp-rd-kronos-efi-disk.wks.in
+++ b/yocto/meta-arm-bsp-extras/wic/fvp-rd-kronos-efi-disk.wks.in
@@ -6,6 +6,6 @@
part /boot --label boot --active --align 1024 --size 64M --use-uuid --part-type EF00 --source bootimg-efi --sourceparams="loader=${EFI_PROVIDER}"
-part / --label root --align 1024 --use-uuid --source rootfs --fstype=ext4
+part / --label root --align 1024 --use-uuid --source rootfs --fstype=ext4 --fixed-size=32700
bootloader --ptable gpt --timeout=1 --append="${GRUB_LINUX_APPEND}" -
Configure the firmware to expect the increased processor count and additional RAM.
diff --git a/yocto/kas/arm-auto-solutions.yml b/yocto/kas/arm-auto-solutions.yml
index 8640276..4aa20b6 100644
--- a/yocto/kas/arm-auto-solutions.yml
+++ b/yocto/kas/arm-auto-solutions.yml
@@ -30,13 +30,15 @@ repos:

env:
TESTIMAGE_AUTO:
-  BAREMETAL_IMAGE_MEM_SIZE:
+  BAREMETAL_IMAGE_MEM_SIZE: "16352M"
+  BAREMETAL_IMAGE_NUM_CPUS: "16"
DOM0_MEMORY_SIZE:
DOMU1_MEMORY_SIZE:
DOMU2_MEMORY_SIZE: -
Check to ensure the changes have been made using
kas.kas shell -c "bitbake-getvar BAREMETAL_IMAGE_MEM_SIZE" -
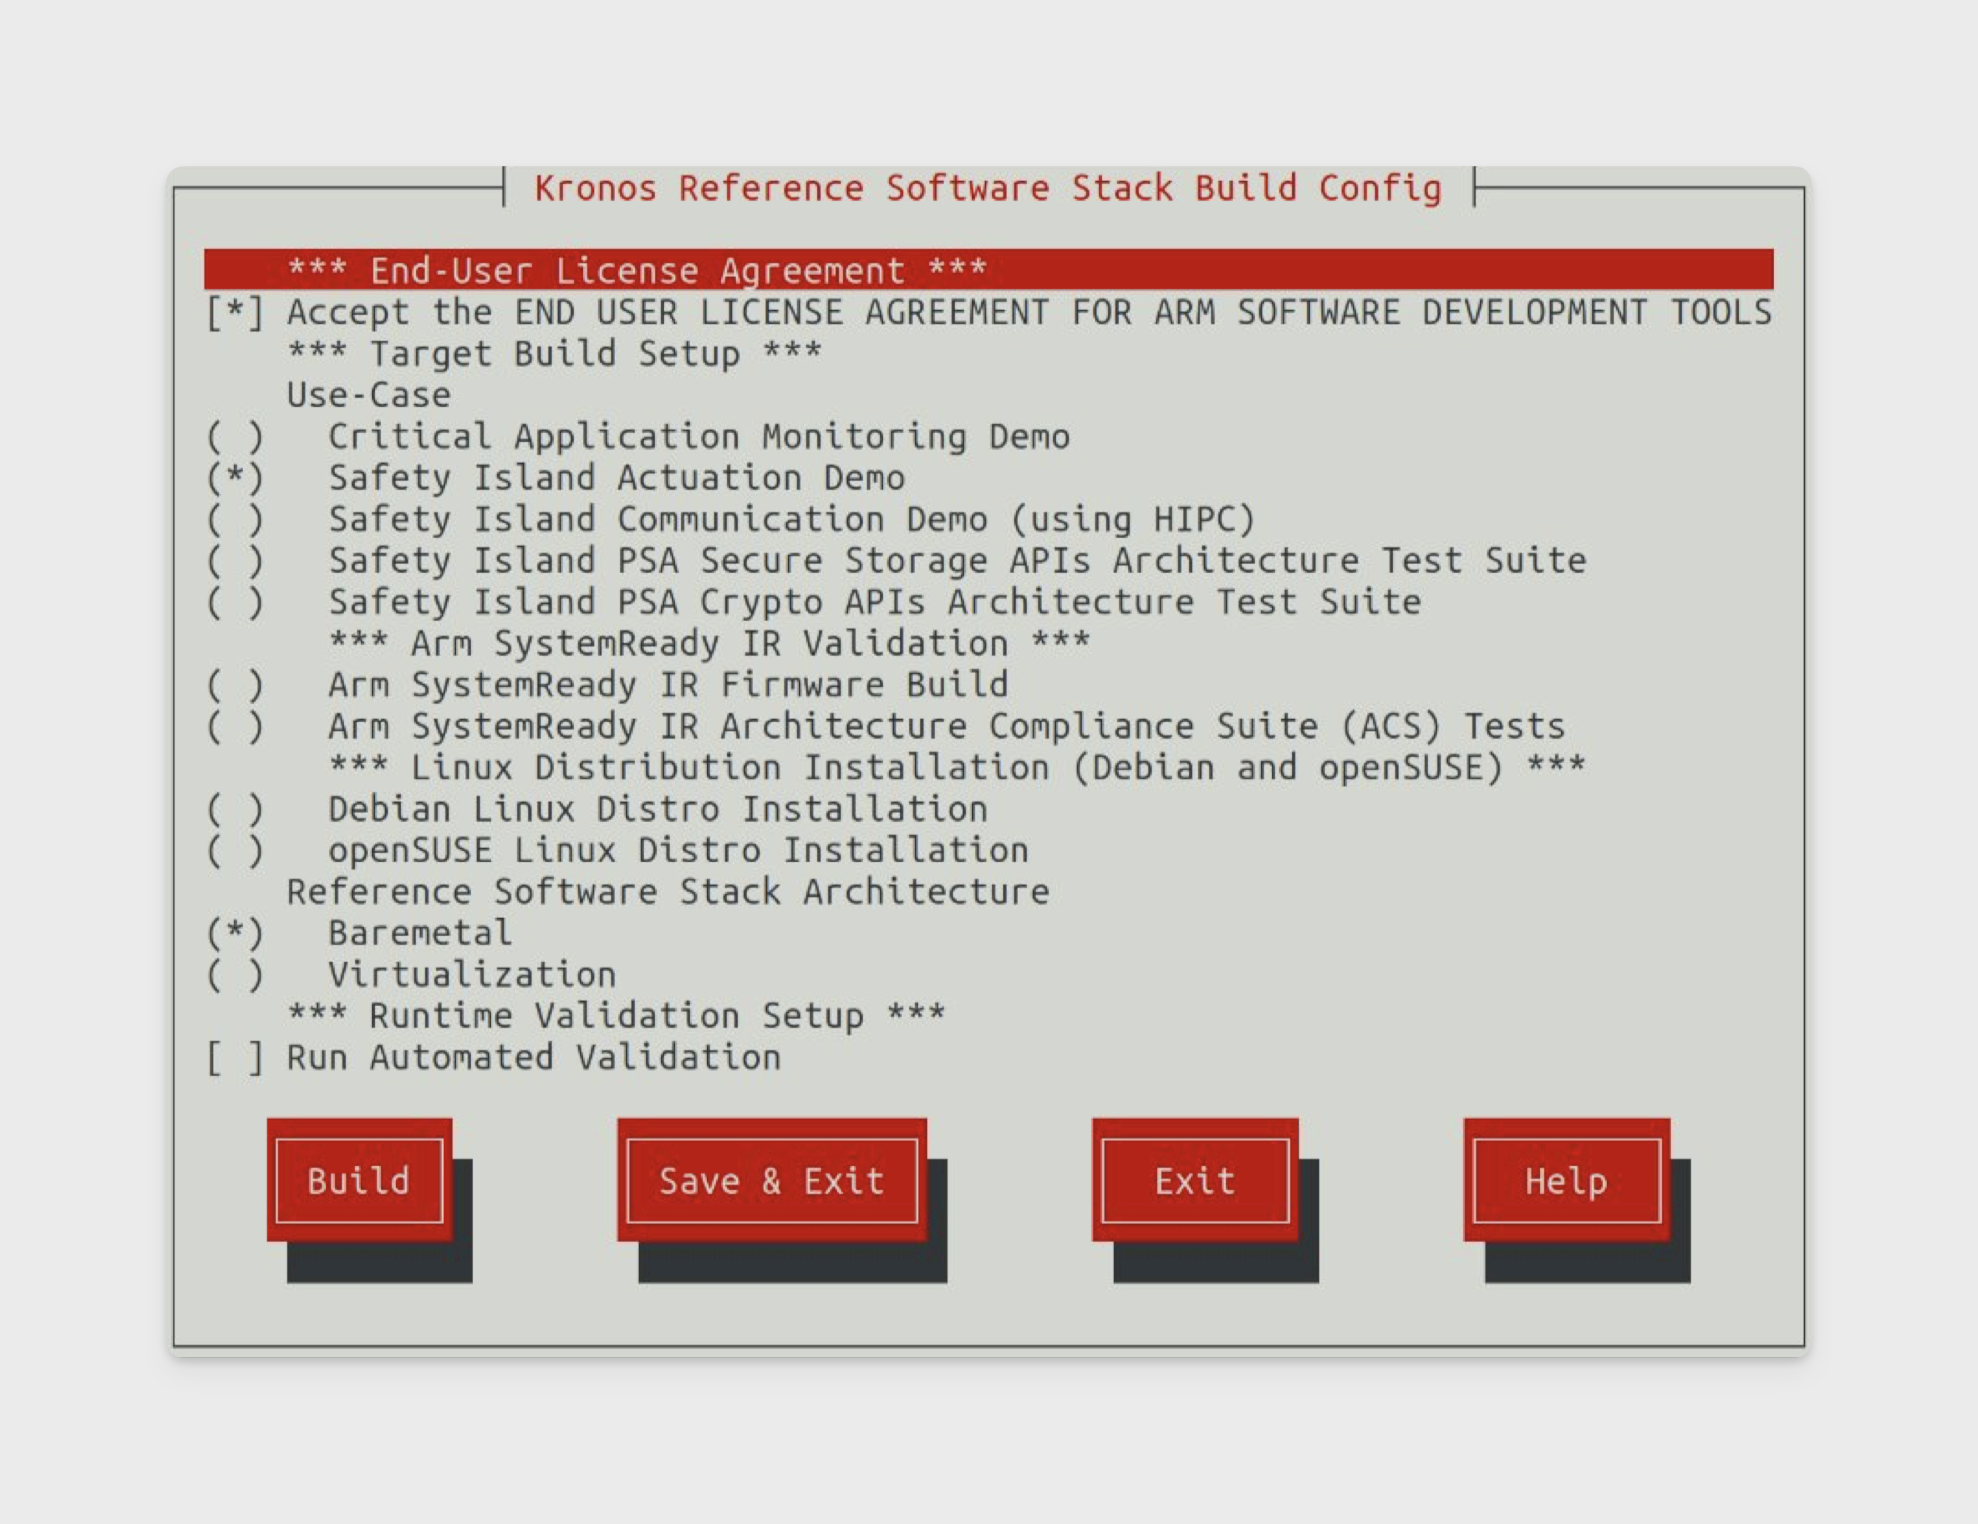
Start the build through the
kas menu. In this example, we select "Safety Island Actuation Demo" and "Baremetal".kas menu kronos/Kconfig
-
When selecting "Safety Island Actuation Demo", the compiled binaries can be found in
build/tmp_$type/deploy/images/fvp-rd-kronos/. Note that$typeis one ofbaremetal,virtualization, orsystemready-glibc.
Upload your image
The simplest way to upload your own firmware image is to download an existing image and replace the relevant components.
| Filename Yocto build | Description | Filename Corellium build |
|---|---|---|
| rse-flash-image.img | RSE boot flash, three SI images and SCP | boot_flash |
| ap-flash-image.img | AP boot flash | ap_flash |
| efi-capsule-update-disk-image-fvp-rd-kronos.img | SD card | sdcard |
| rse-nvm-image.img | Lifecycle Manager OTP | lcm_op |
| $type-image-fvp-rd-kronos.wic / arm-systemready-ir-acs-fvp-rd-kronos.wic | System storage | virtio_0 |
| encrypted_dm_provisioning_bundle.bin | DM provisioning bundle | firmware/encrypted_dm_provisioning_bundle.bin |
| encrypted_cm_provisioning_bundle_0.bin | CM provisioning bundle | firmware/encrypted_cm_provisioning_bundle_0.bin |
| rss-rom-image.img | RSS ROM | firmware/rss-rom-image.img |
Boot a custom ISO
The build config for the reference software stack supports different opterating systems including Debian and openSUSE.
Users who want to run a custom Linux operating system have several options.
Upload a custom ISO to the SD card
-
Start with an existing RD-1AE device.
-
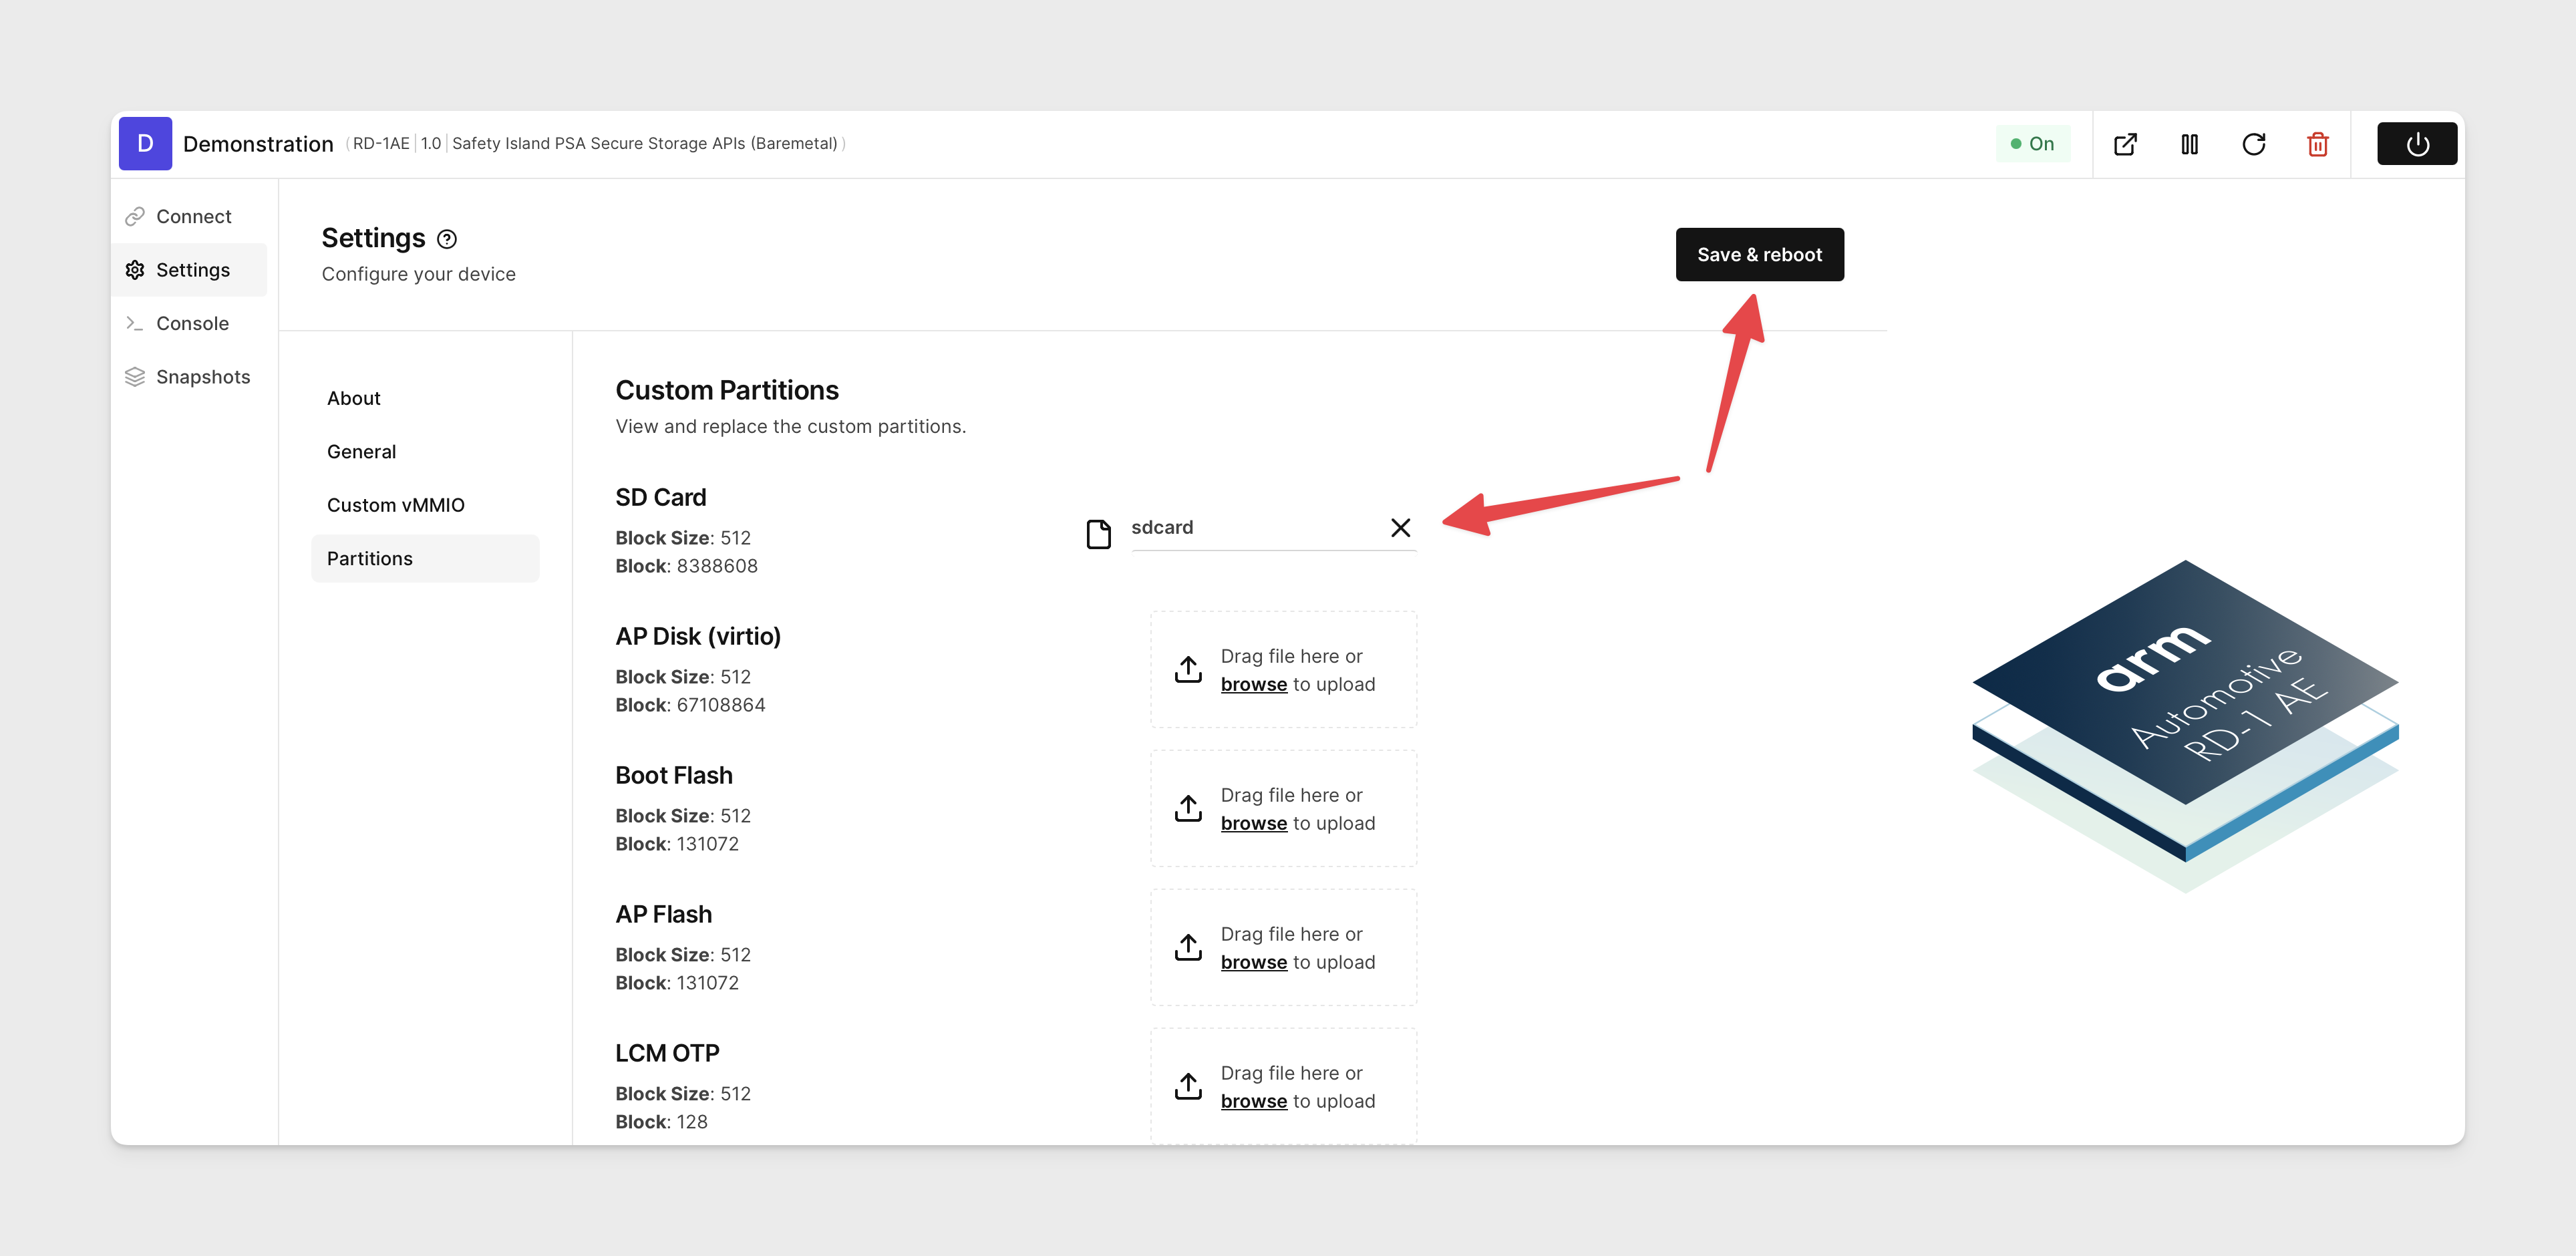
Navigate to Settings -> Partitions for your device on the AVH web interface.
-
Upload your custom ISO to the SD card partition then click Save & Reboot.

-
The boot order is VIRTIO -> MMC -> PXE, so you will need to stop U-Boot. Press
returnwhen you seeHit any key to stop autobootduring the boot process.U-Boot 2023.07.02 (Jul 11 2023 - 15:20:44 +0000) arm_fvp
Model: RD Kronos
DRAM: 2 GiB (effective 4 GiB)
Arm FF-A framework discovery
FF-A driver 1.0
FF-A framework 1.0
FF-A versions are compatible
Core: 25 devices, 16 uclasses, devicetree: board
MMC: mmci@c050000: 0
Loading Environment from nowhere... OK
In: serial@2a400000
Out: serial@2a400000
Err: serial@2a400000
Net: eth0: virtio-net#0
Hit any key to stop autoboot: 3 -
After interrupting the boot, explicitly choose the SD card at the prompt.
=> run bootcmd_mmc0
switch to partitions #0, OK
mmc0 is current device
Scanning mmc 0:2...
FF-A driver 1.0
FF-A framework 1.0
FF-A versions are compatible
...
Package a custom ISO into the firmware image
-
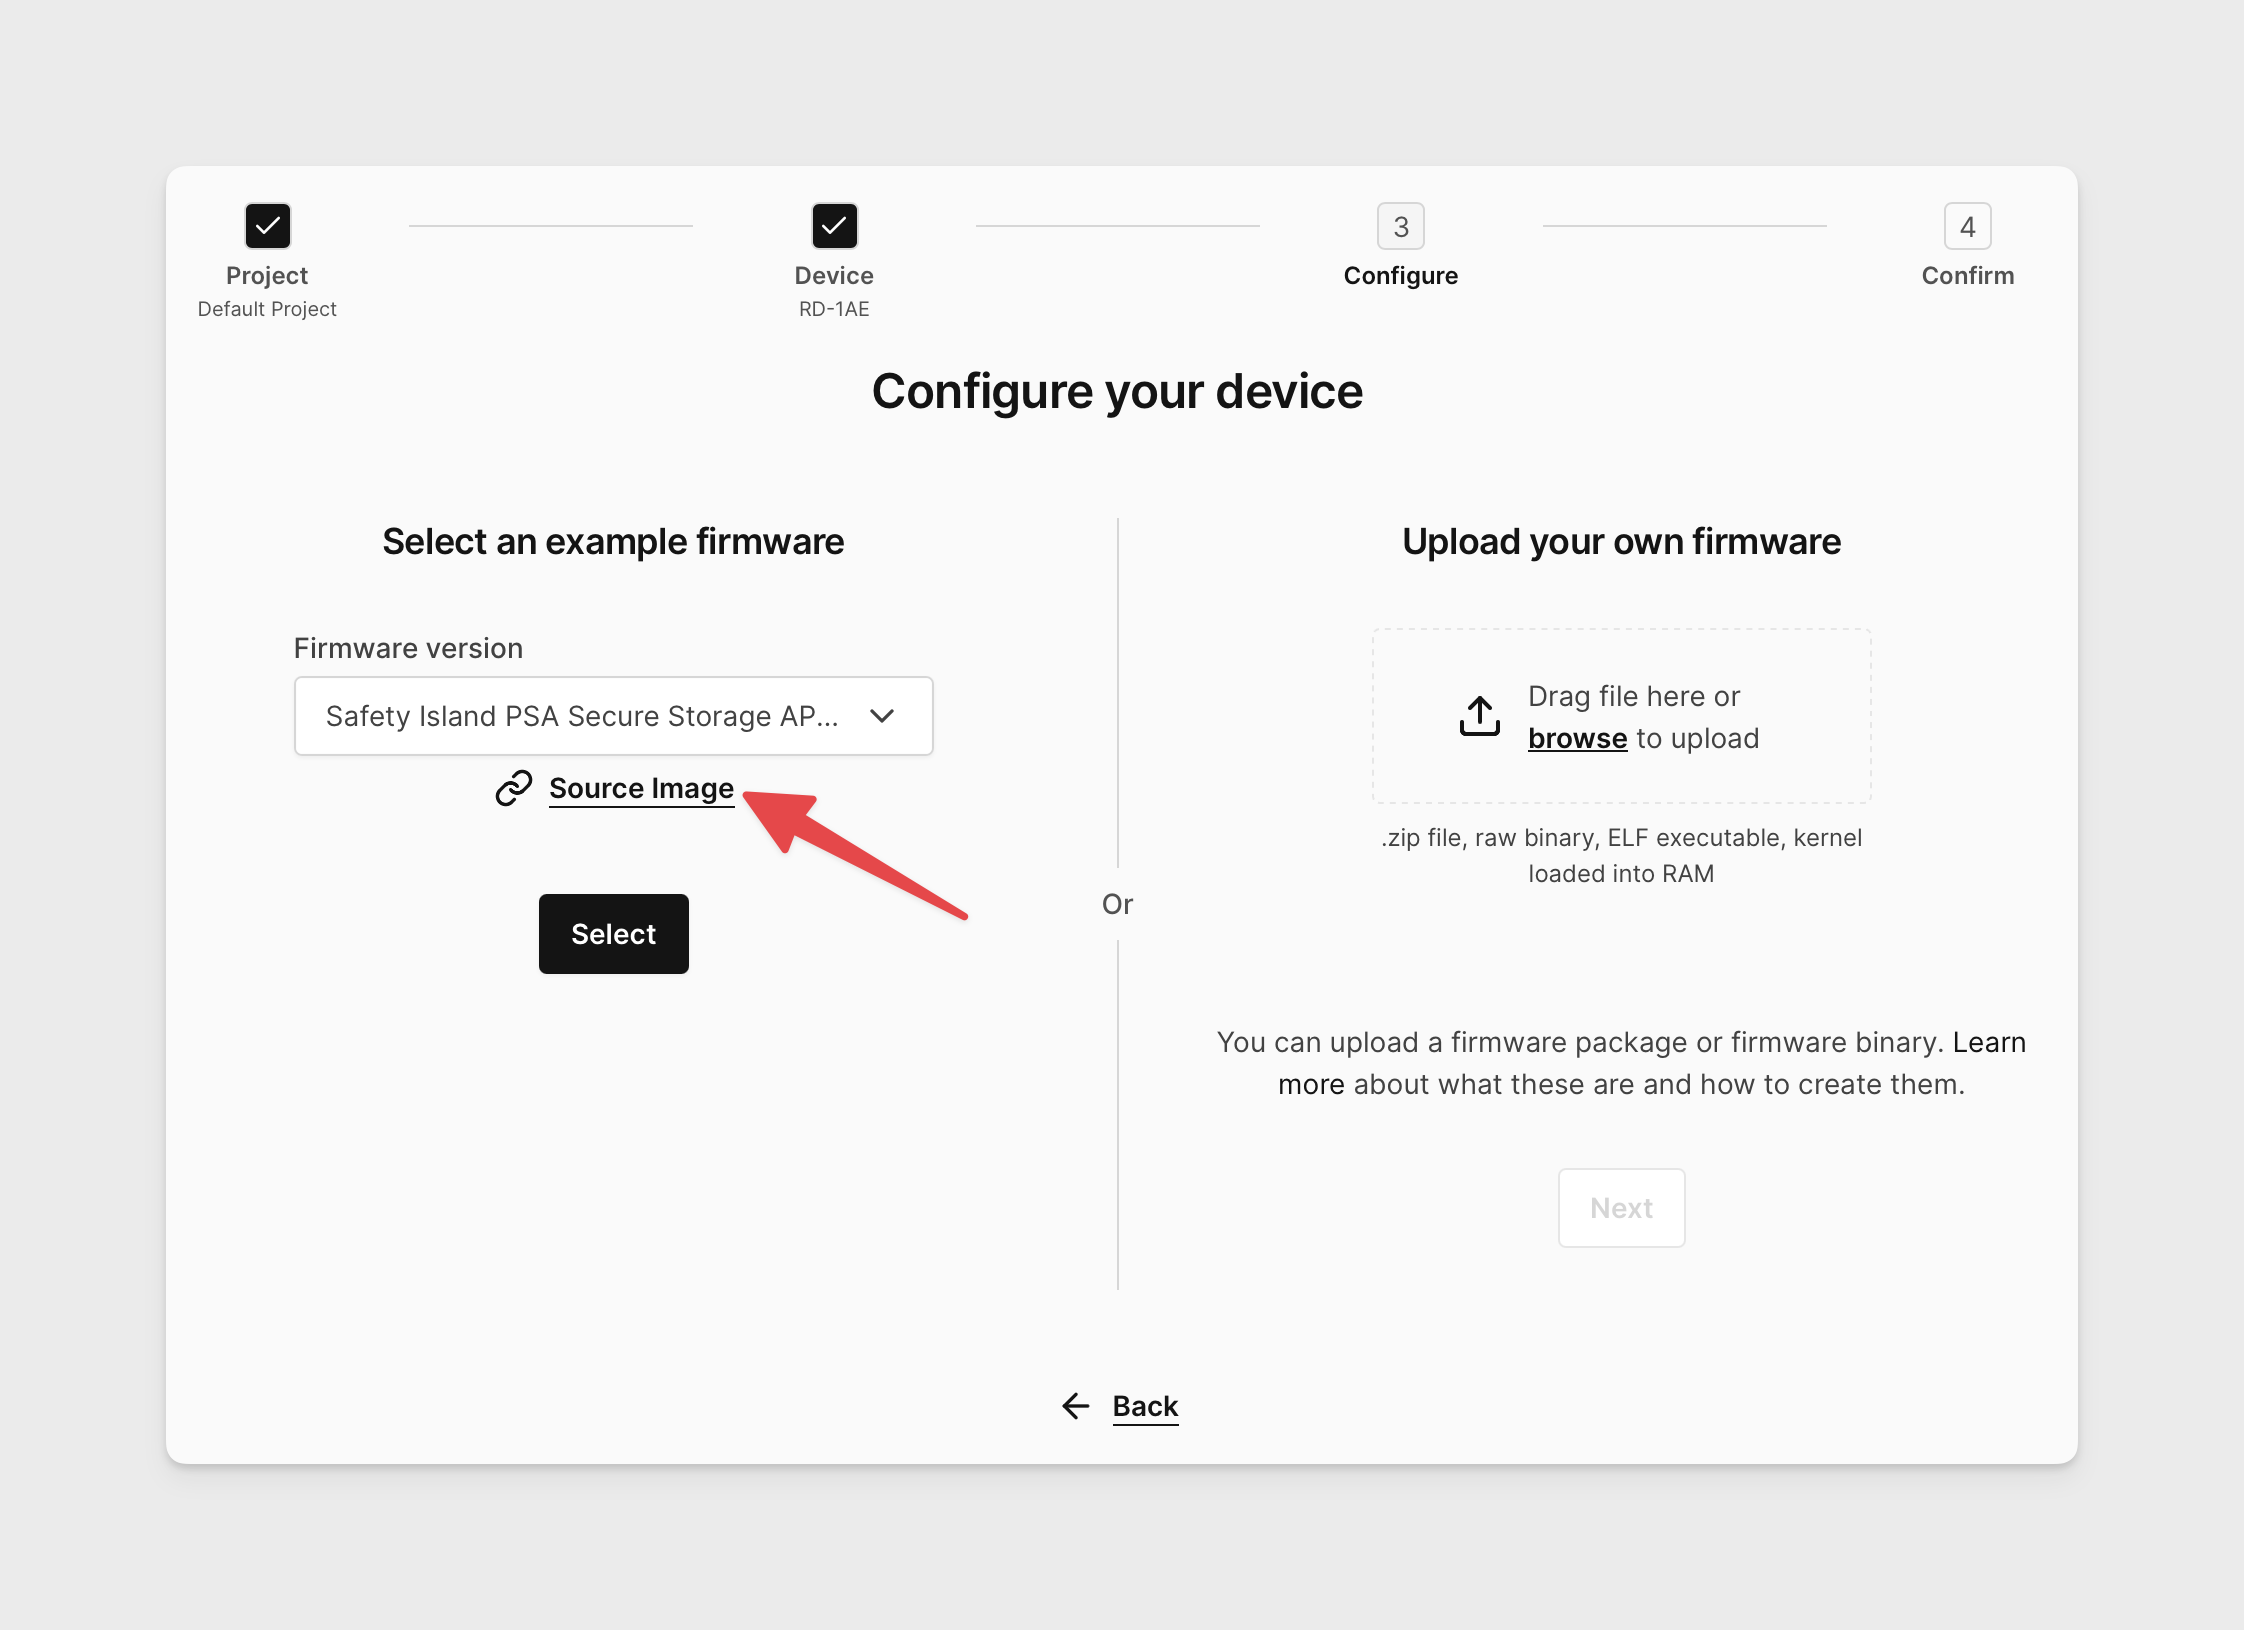
Download the source image ("coreimg") for your desired RD-1AE firmware image from the device creation menu.

-
Move the ISO to the same working directory as the coreimg.
mv /path/to/iso sdcard -
Update the
sdcardarchive member of the coreimg file.zip <coreimg_source_image> sdcard -
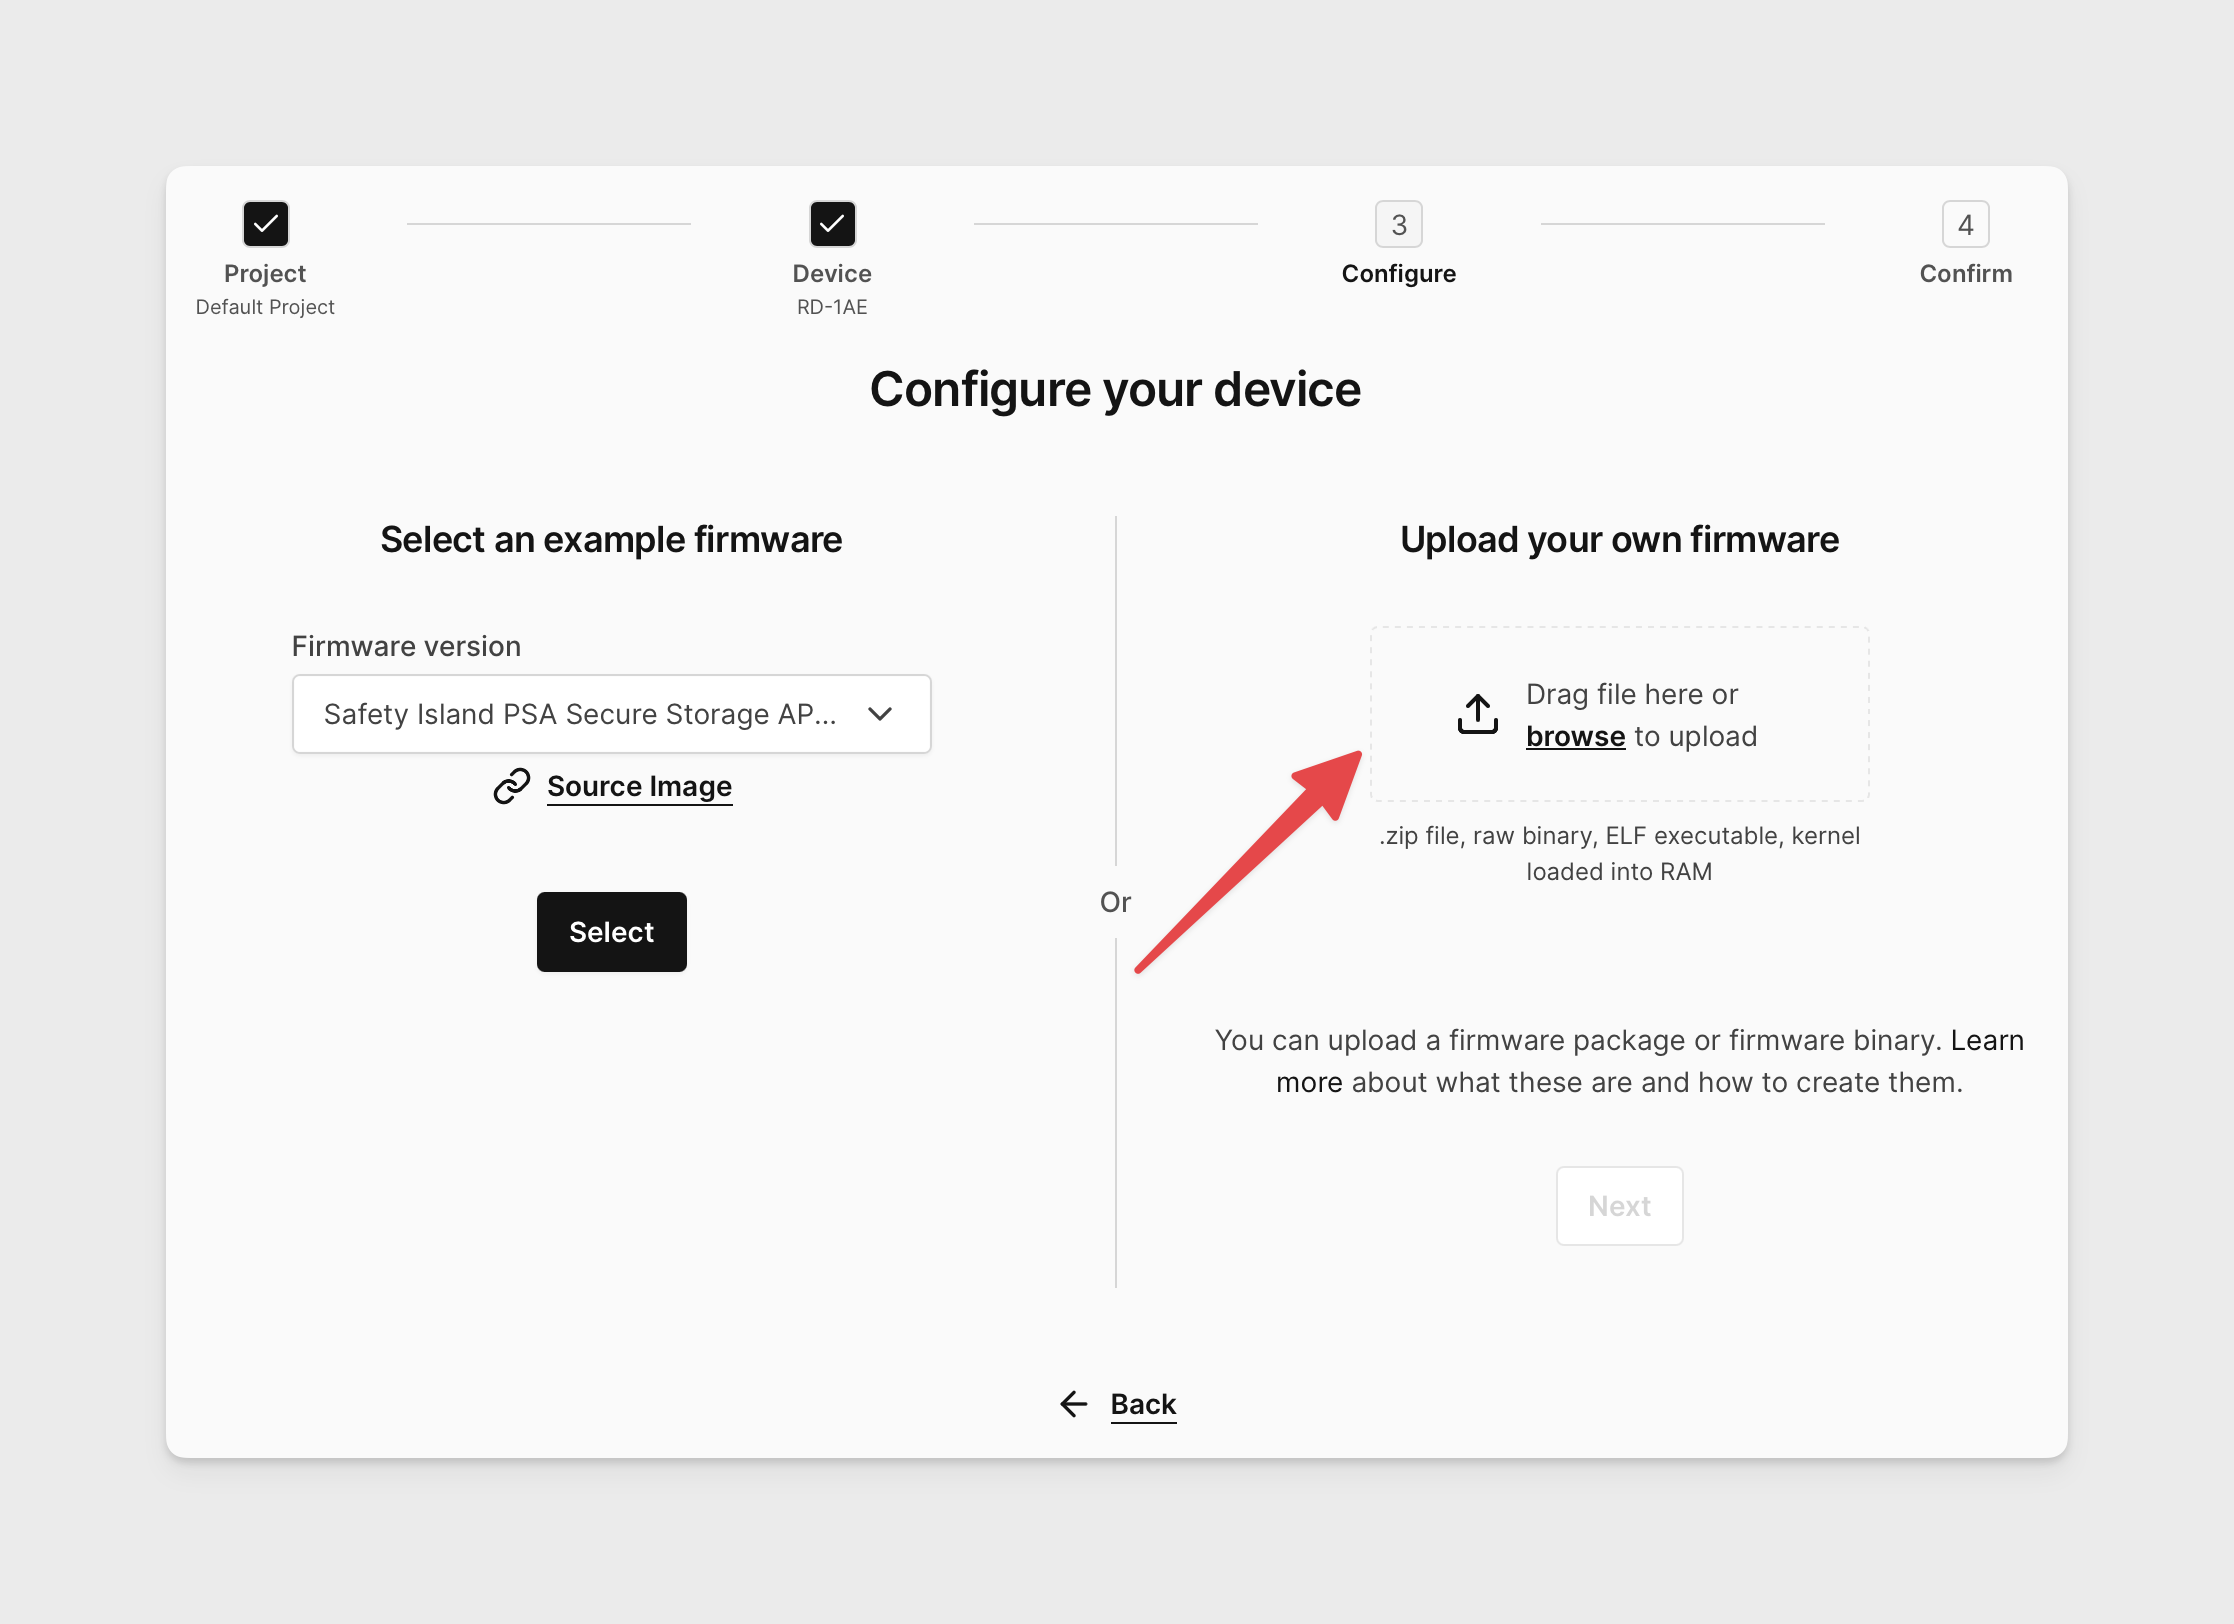
Create an RD-1AE using your custom firmware image.

Building the image with custom Safety Island, SCP, or RSS firmware
Due to the use of secure boot through the RD1-AE firmware boot process it is not possible to shim in new firmware revisions of a specific subsystem component without rebuilding the entire stack. The RD1-AE Yocto-based firmware builds flattened flash images that include the firmware of all subsystems, each signed with common keys generated during the build. Consequentially, each firmware element is not exported explicitly - but are rather contained within the AP Flash and Boot Flash flash partitions and are used as-is from the build process.