Quickstart for AVH REST API
This quickstart explains how to start using Arm Virtual Hardware REST API. It guides through the initial steps: logging in, setting the API Token, finding your project ID, and finally creating a device.
-
Log in to AVH.
-
Retrieve your API Token.
-
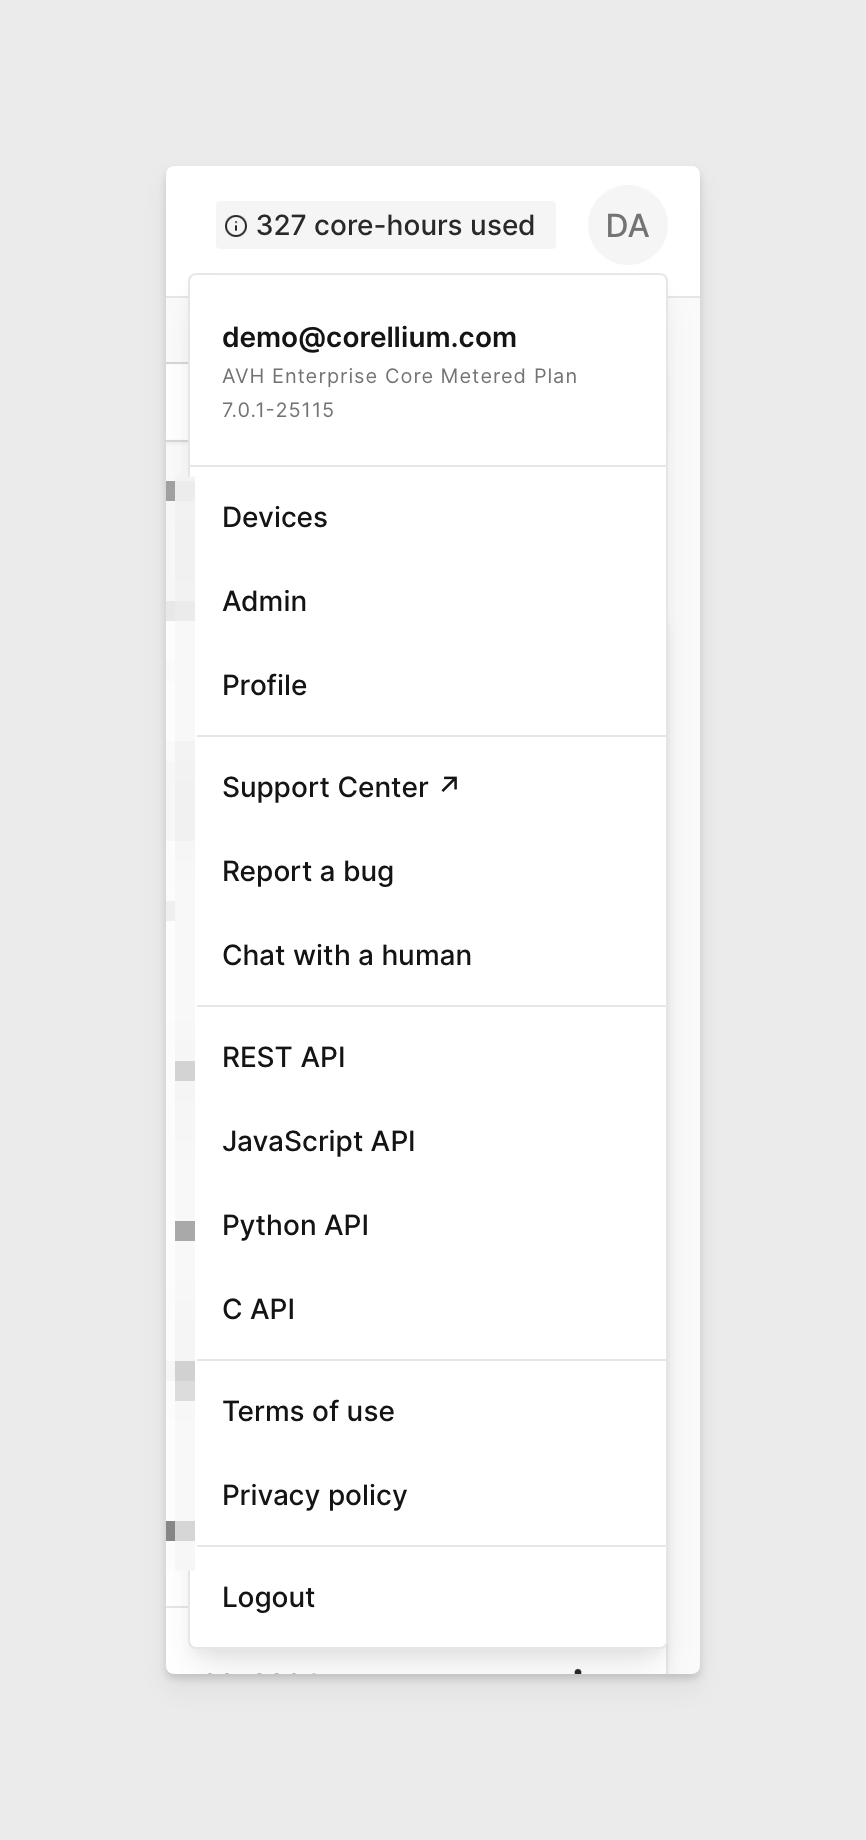
Open the the profile dropdown on the top-right and click on "REST API." Alternatively, navigate to this page.
-
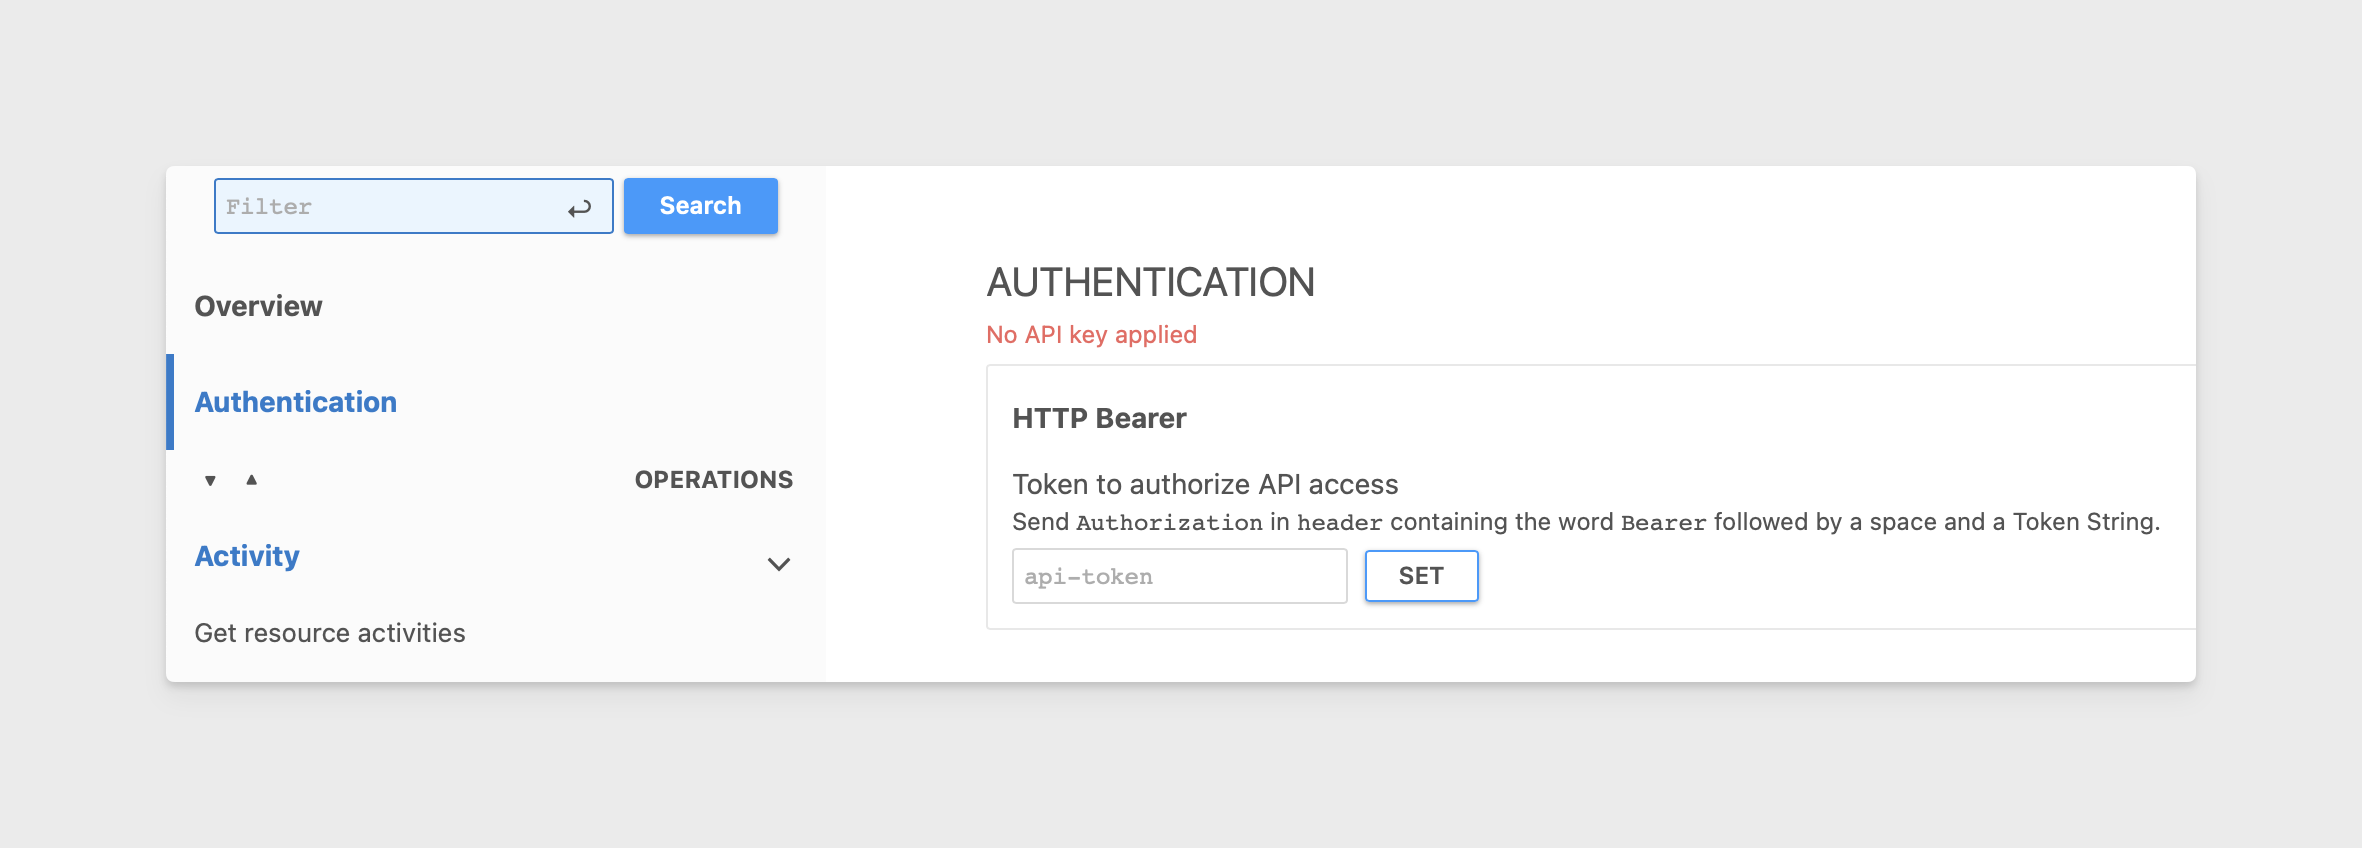
Open the Authentication tab. You should see a red "No API key applied" message.
-
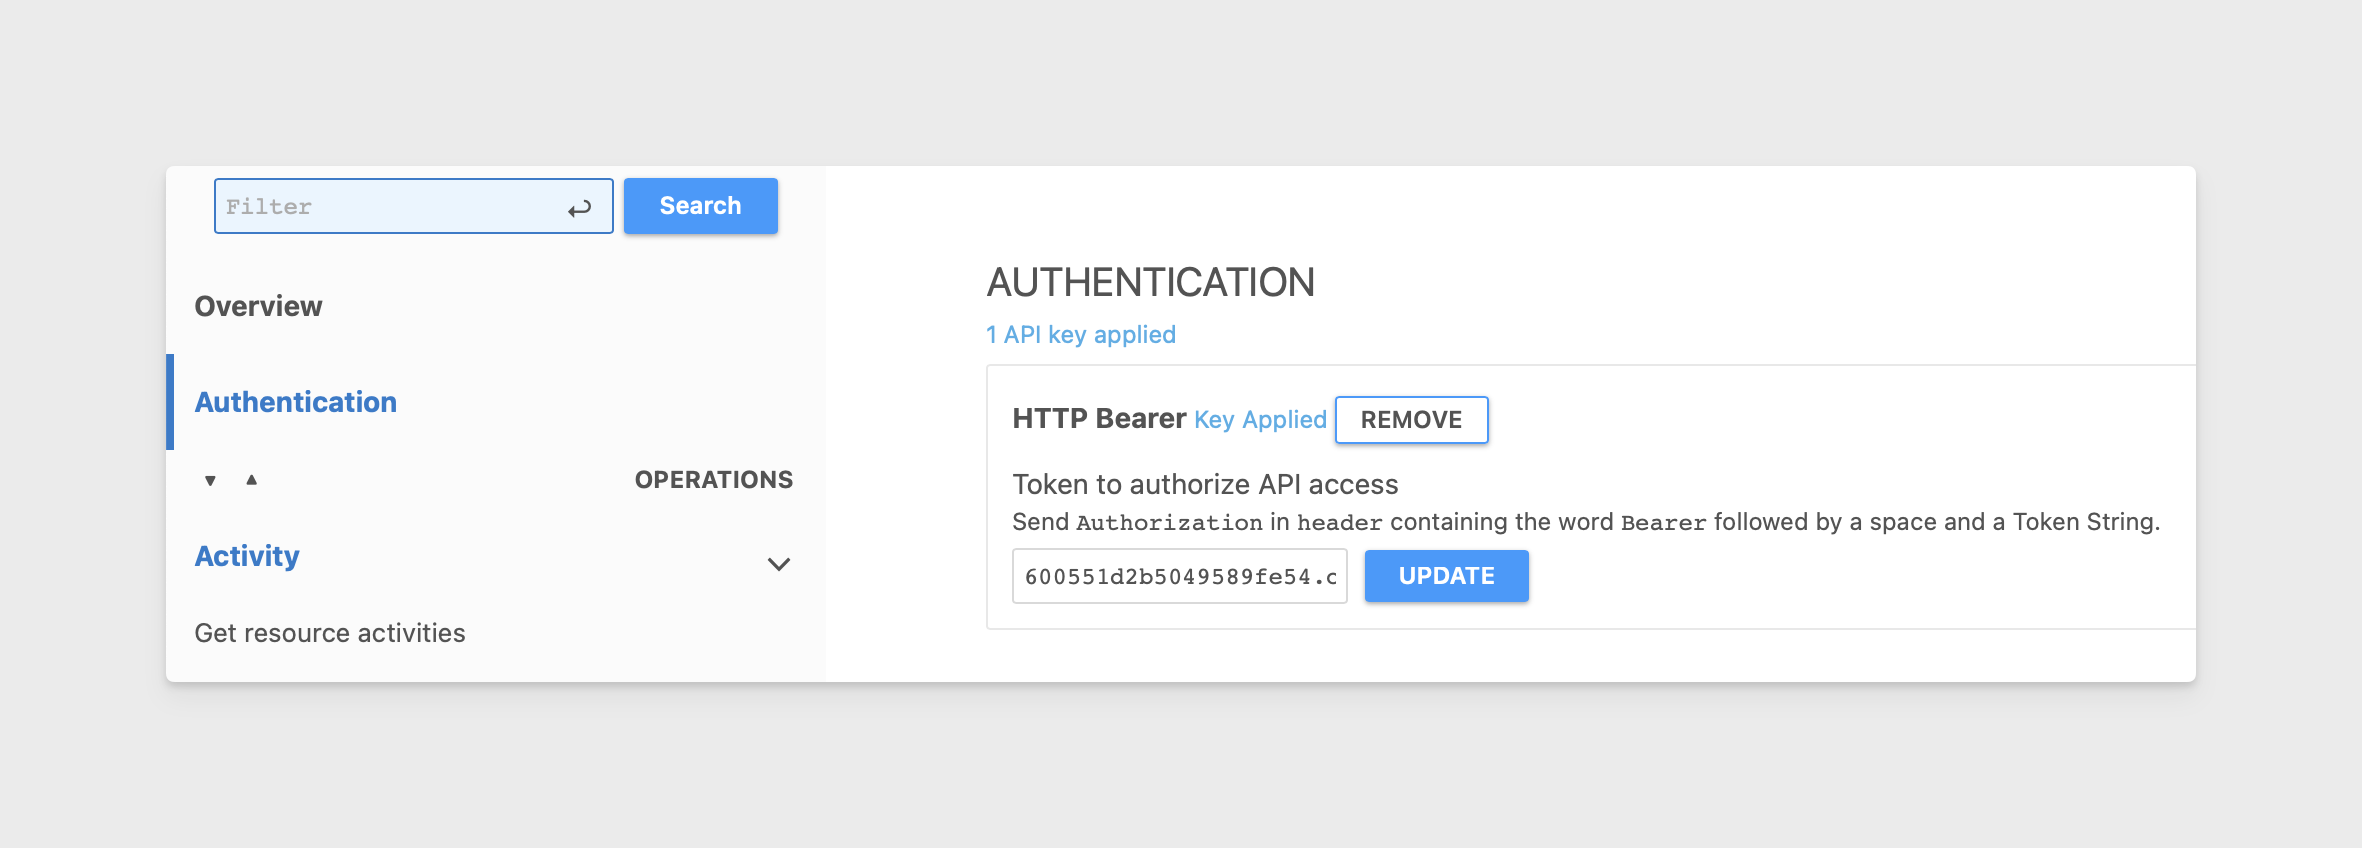
Paste your API token and click SET. You should see a blue "1 API key applied" message.
-
In the left menu, scroll down to the Projects section and click on the Get Projects endpoint.
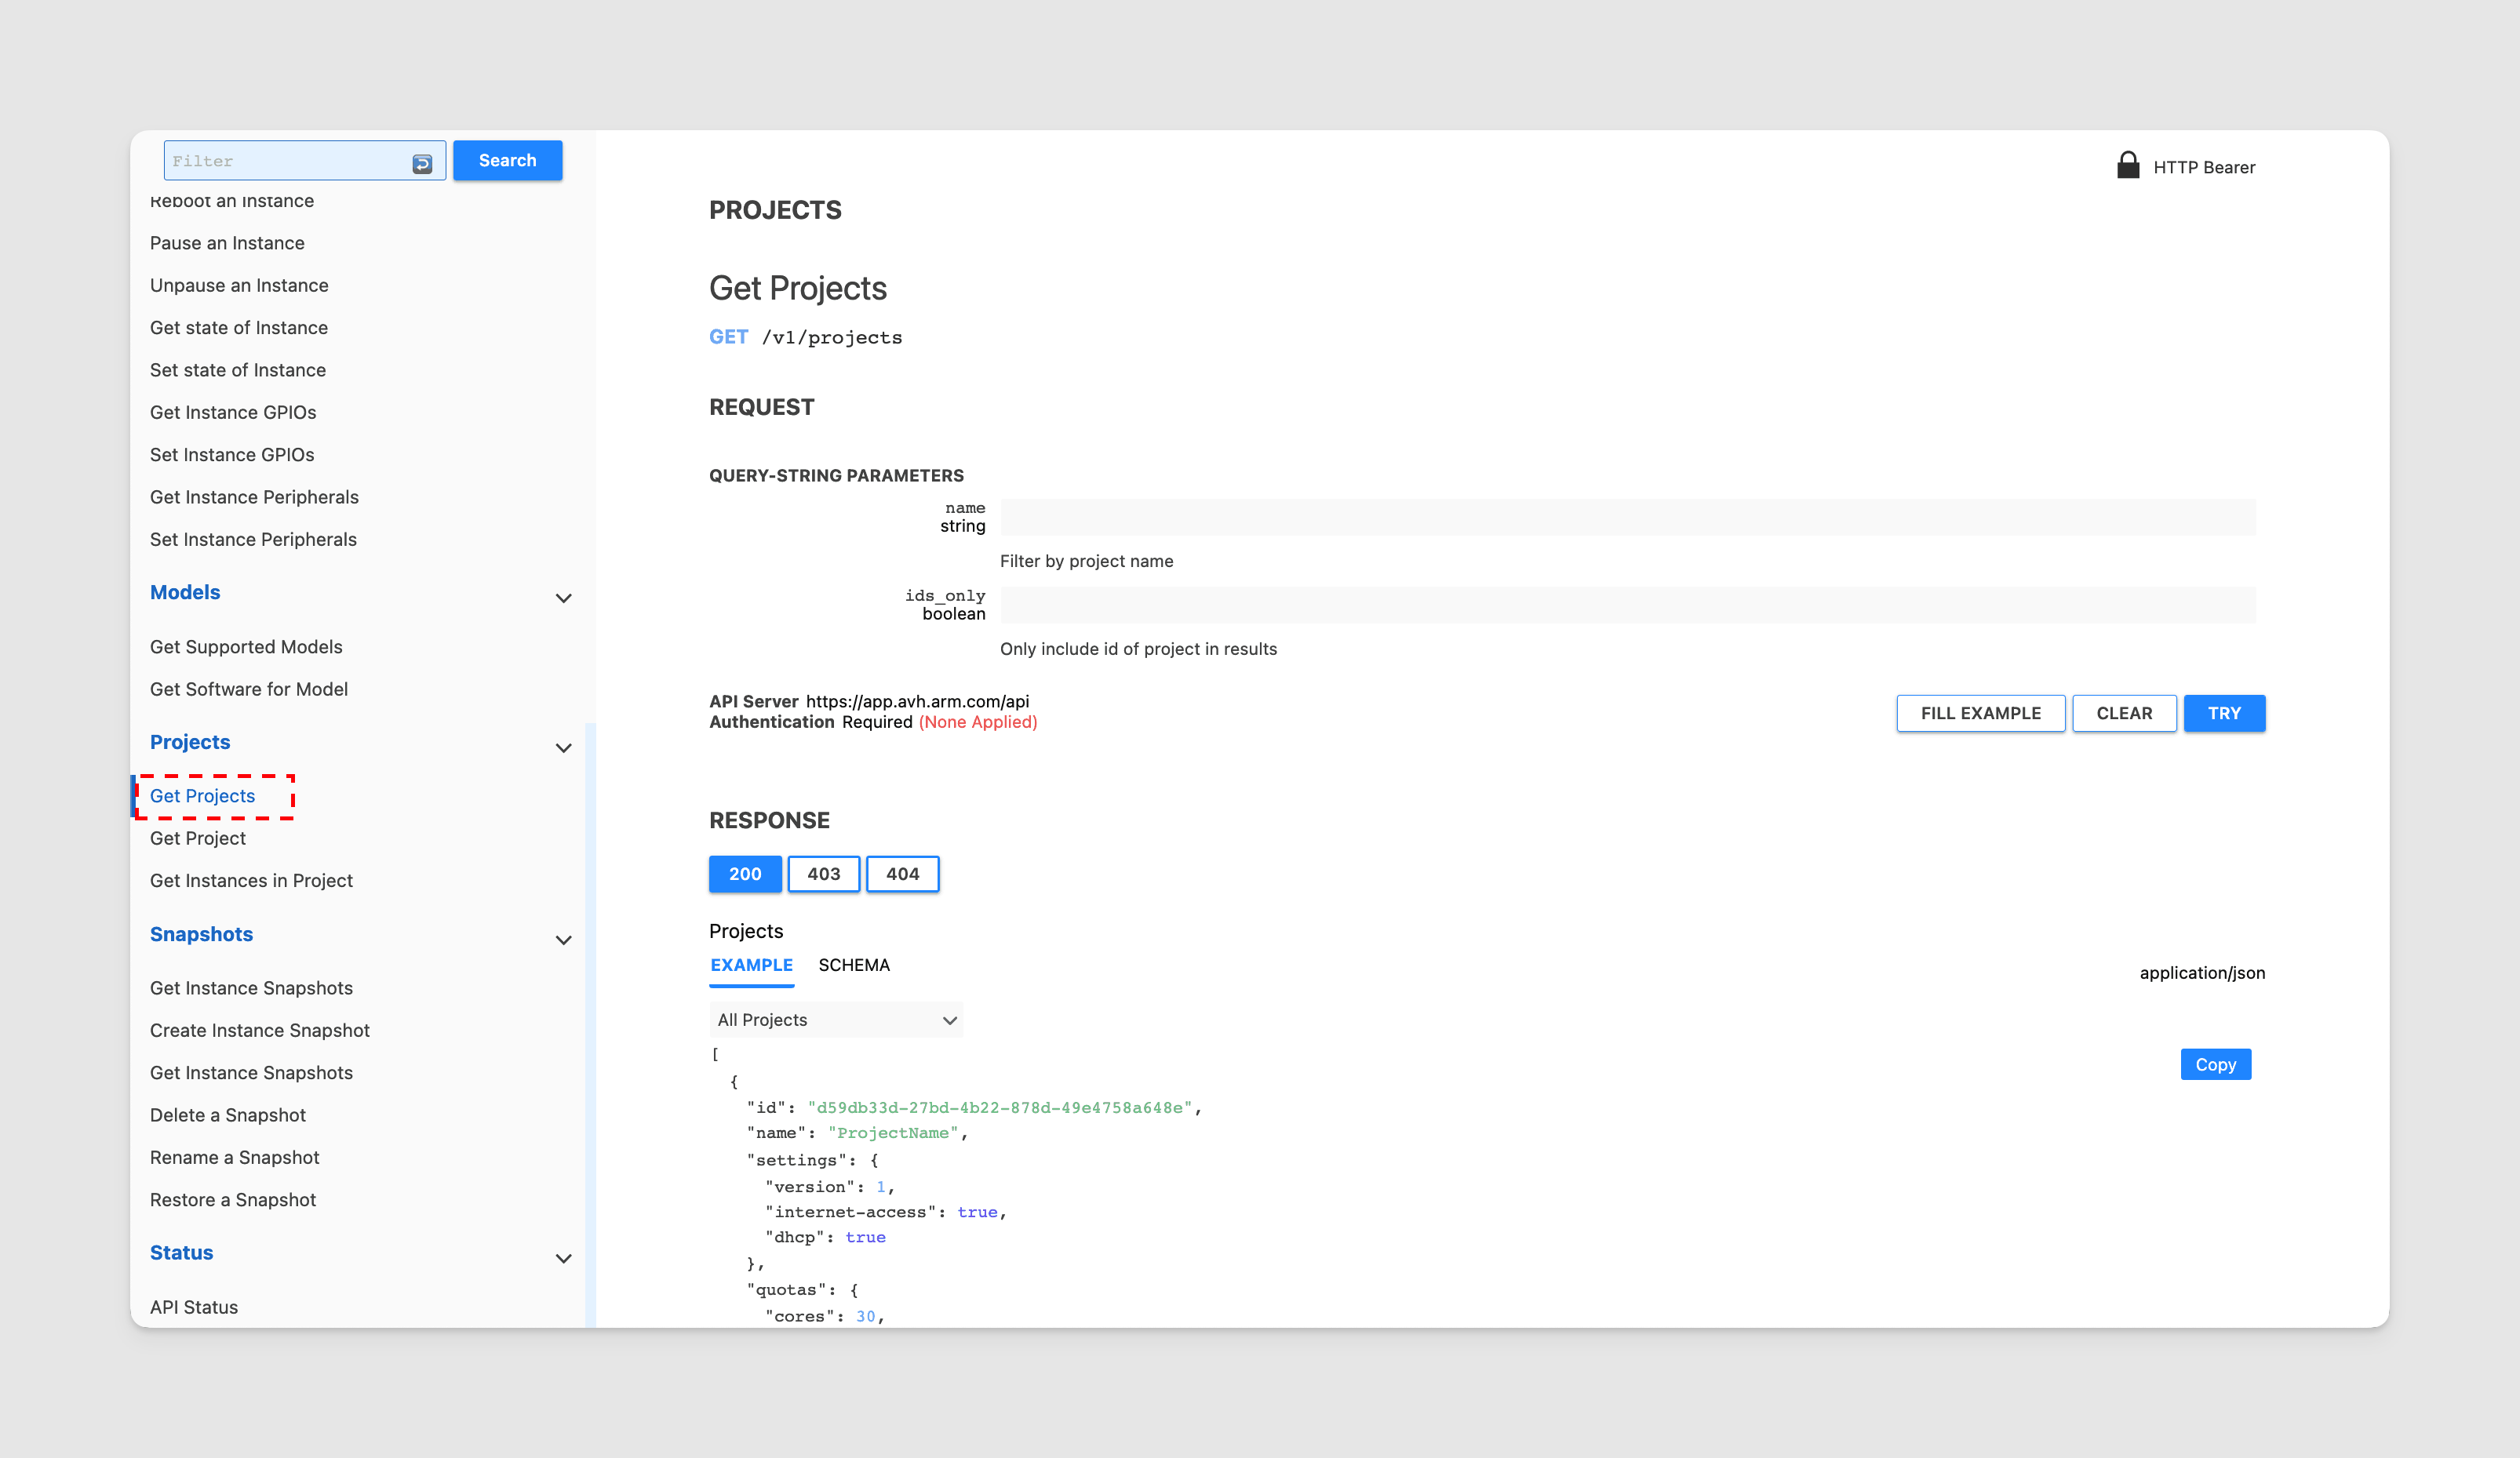
-
Click TRY to get your project's information. Copy the
idfrom the JSON response, which you will need to create the device.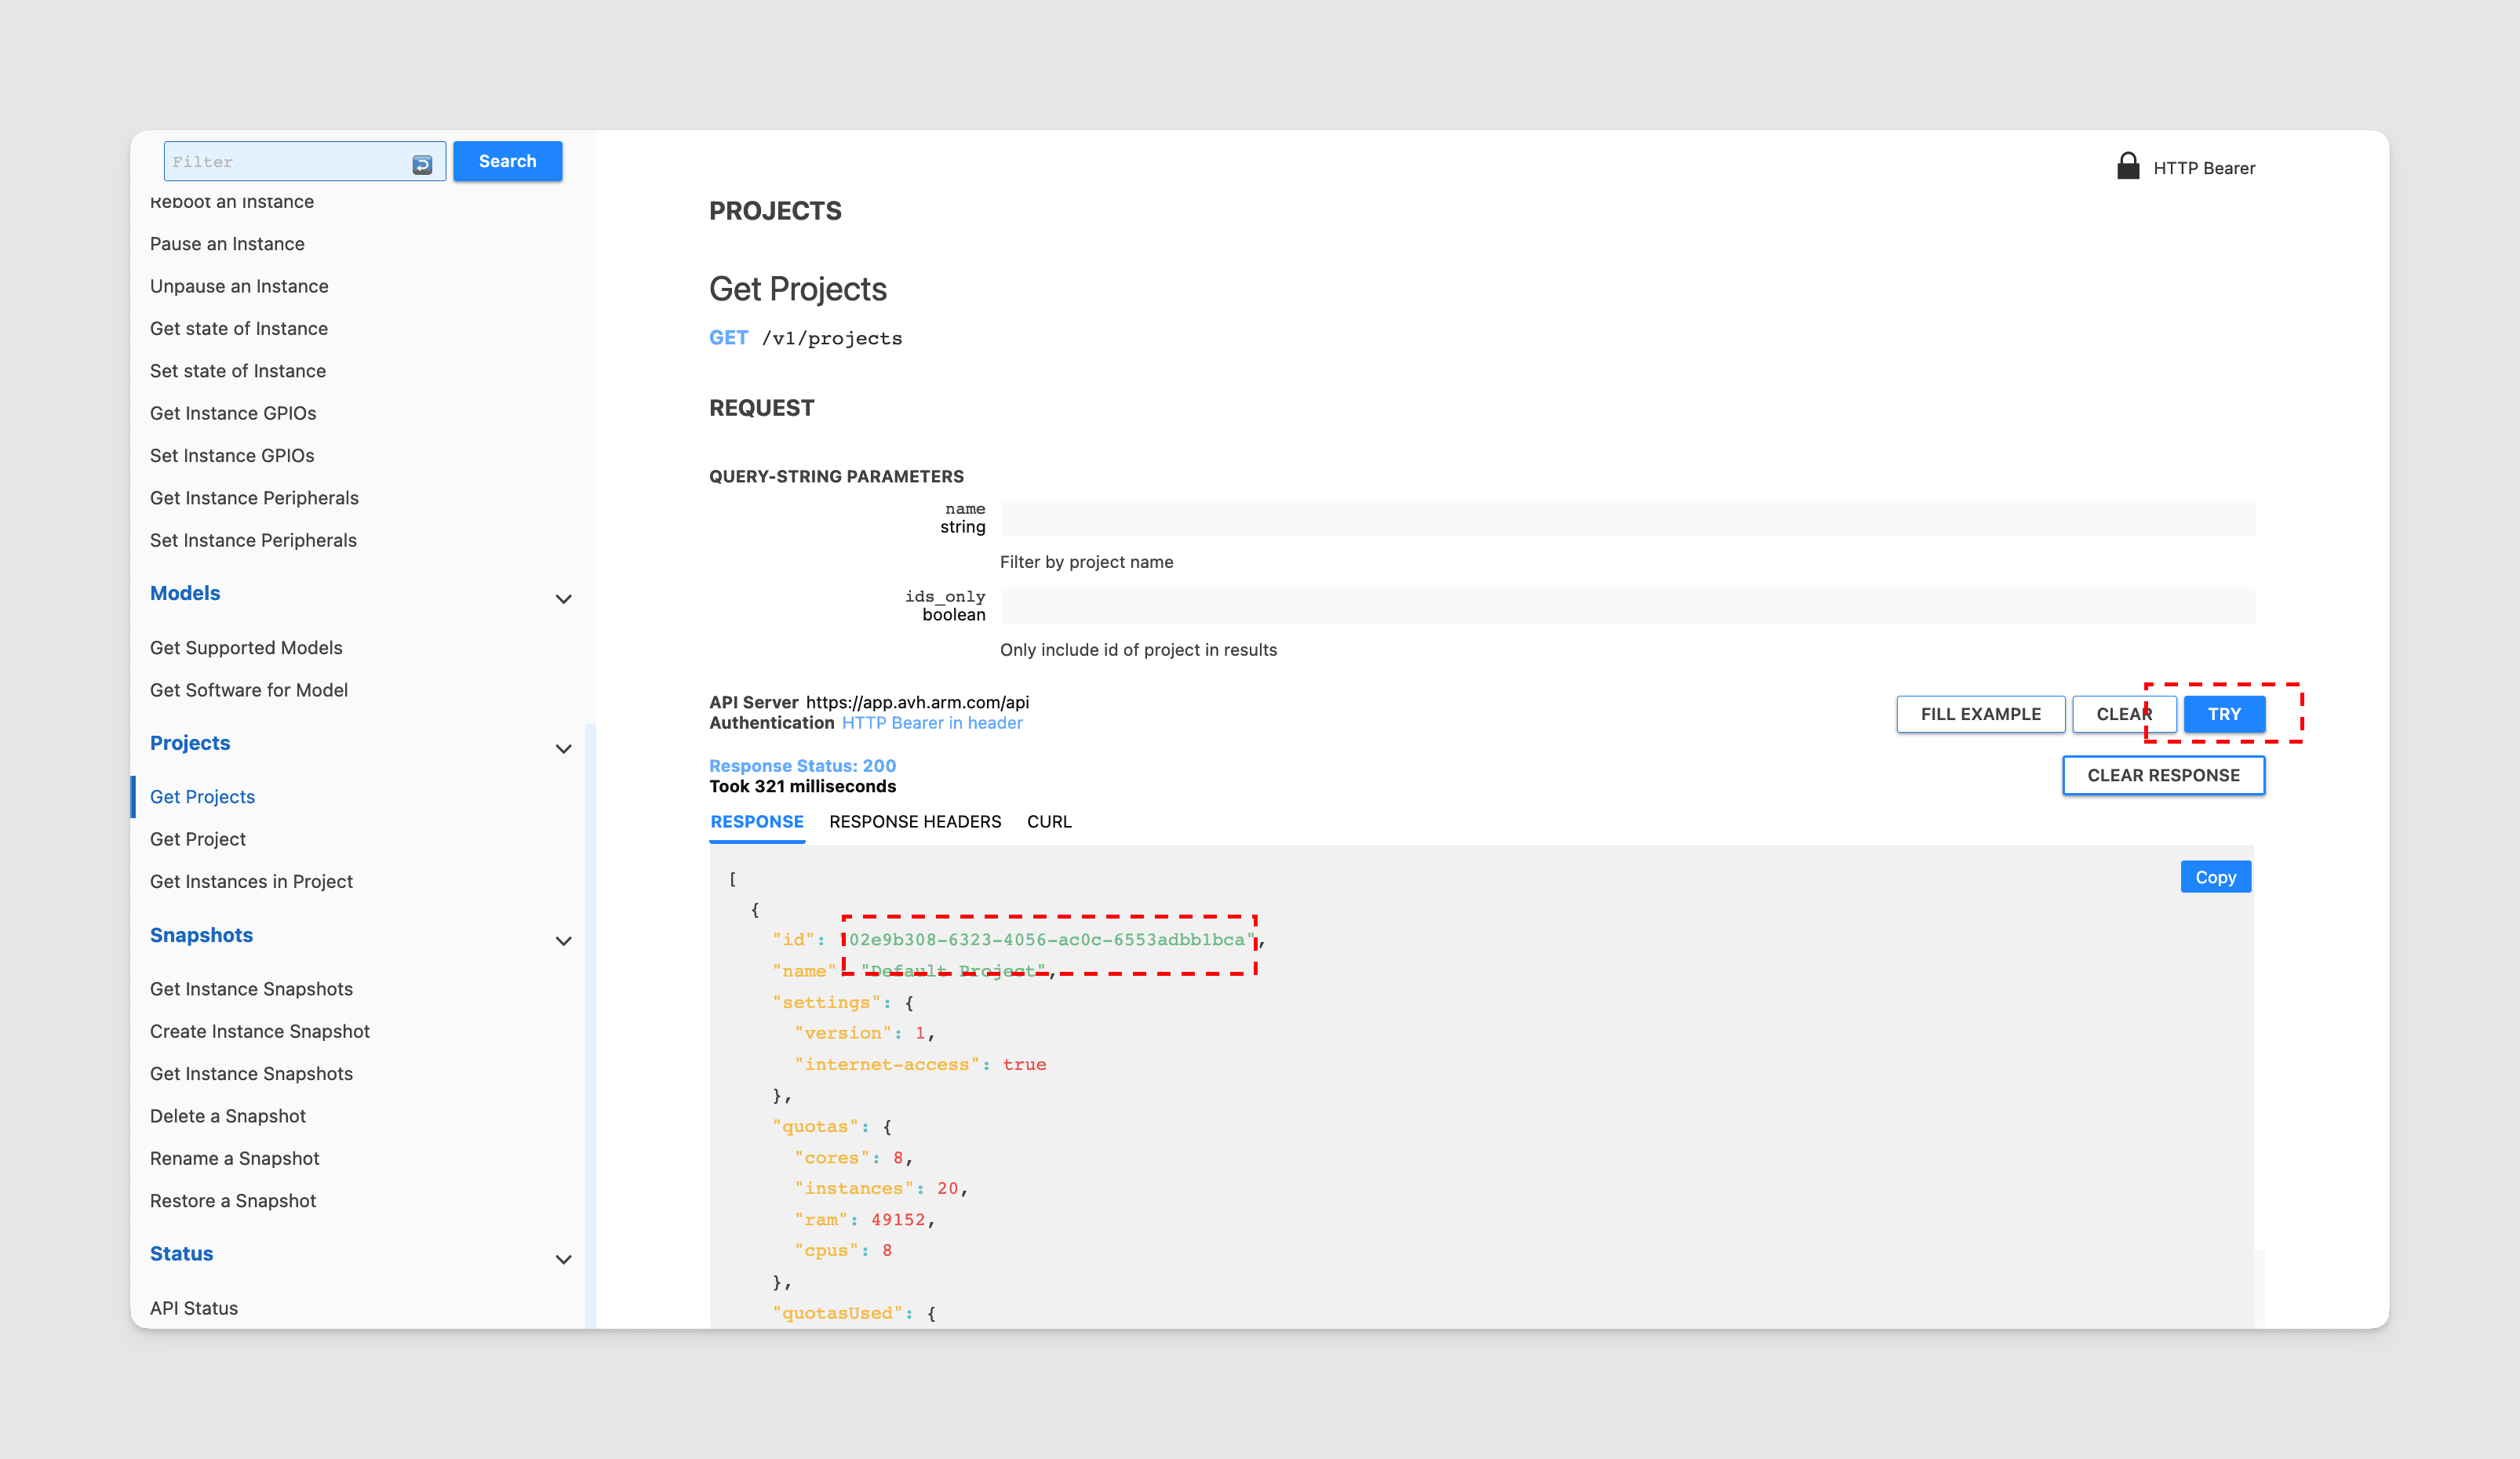
-
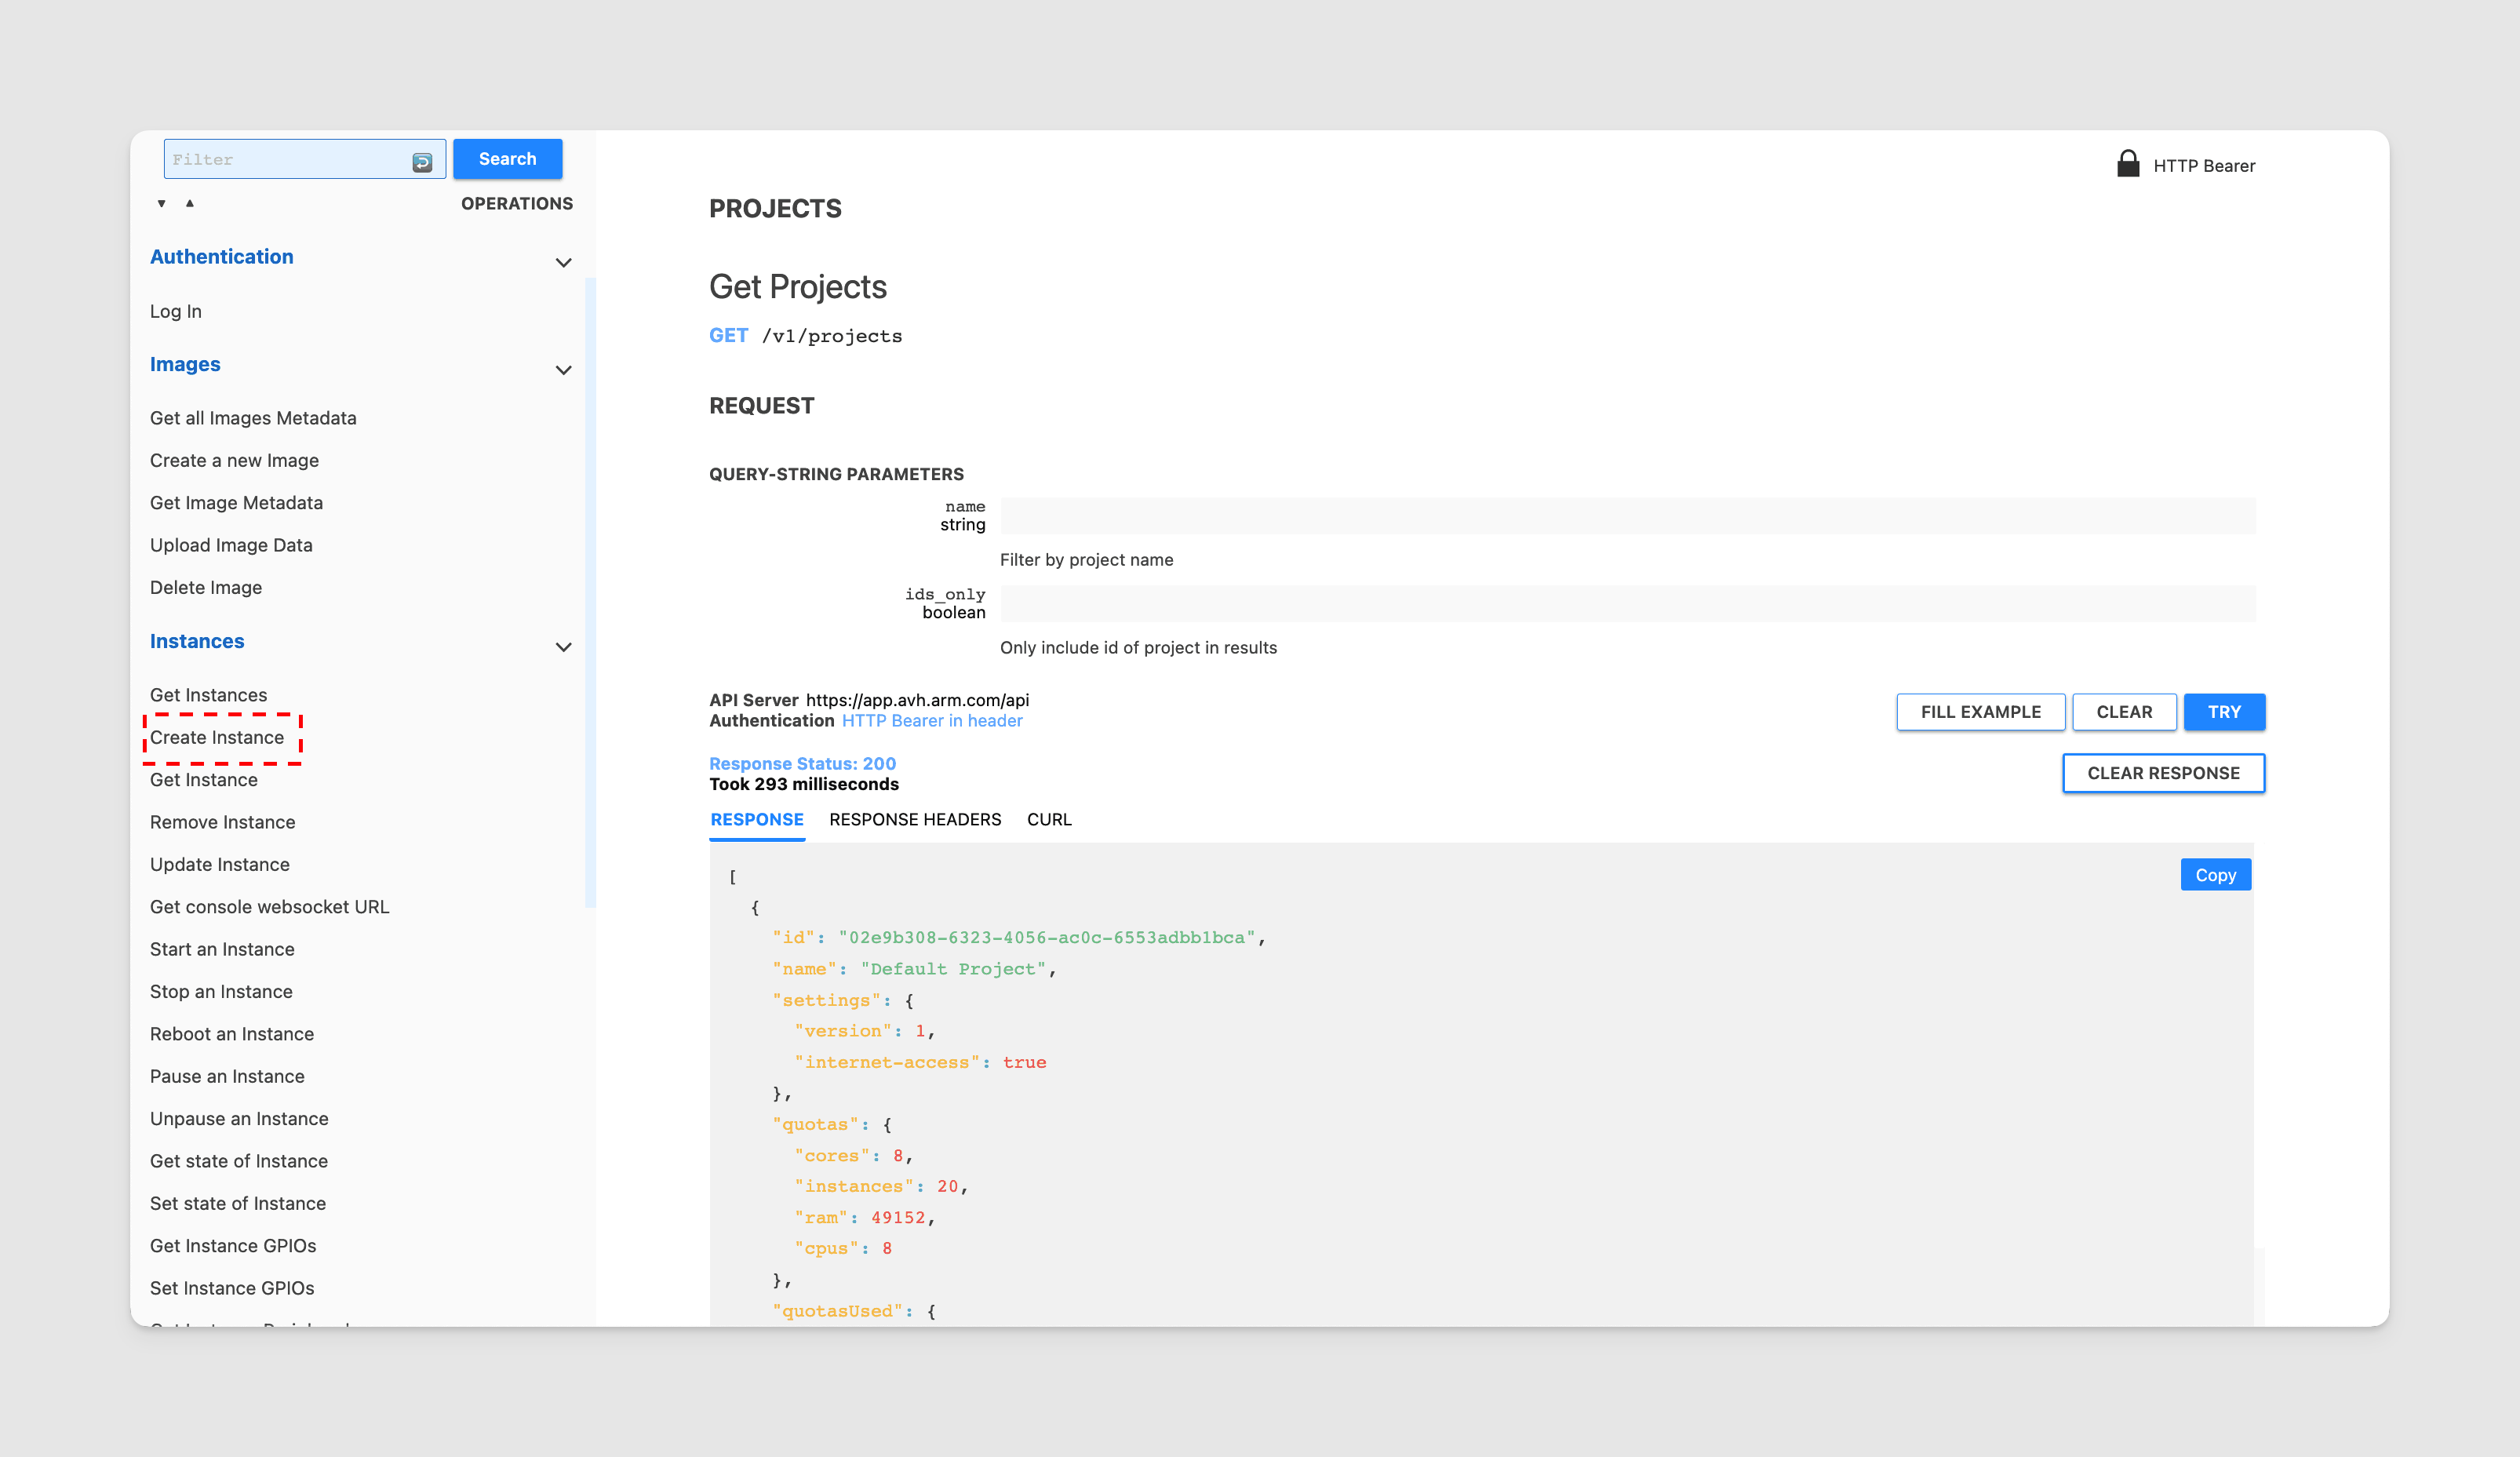
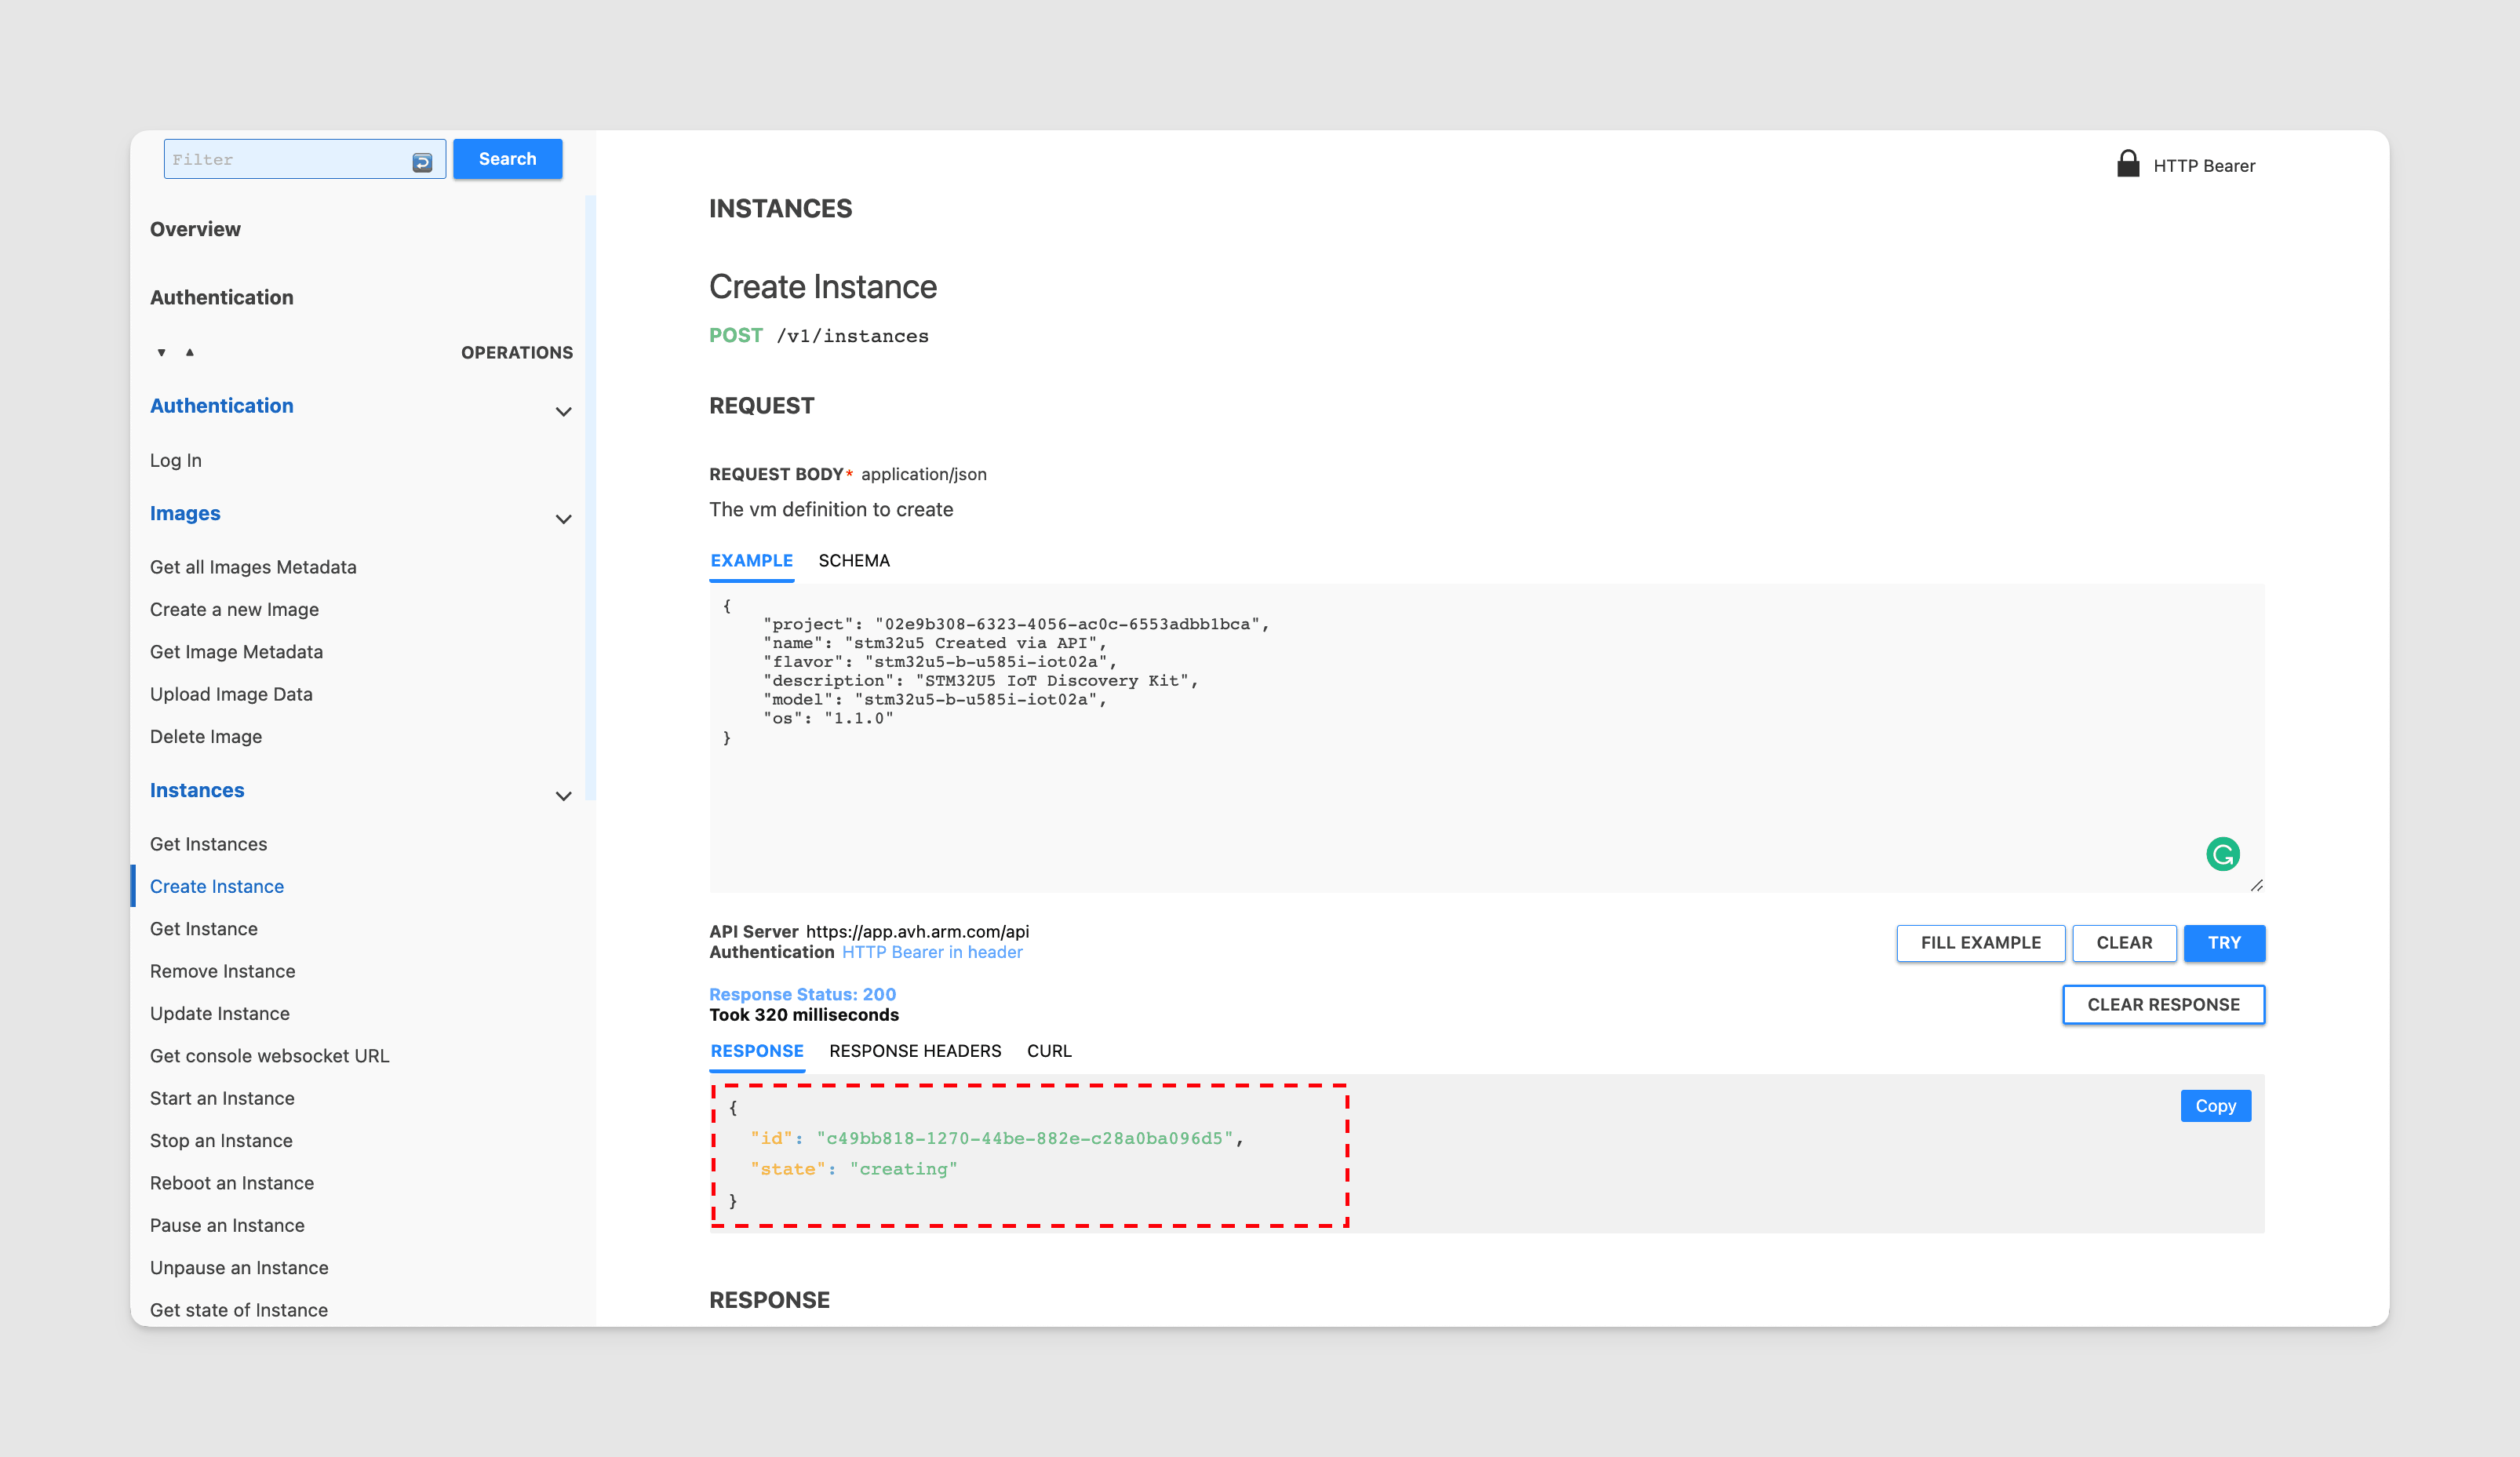
In the left menu, scroll up to the Instances section click Create Instance.
-
We are going to create a STM32U5 IoT Discovery Kit device and name it "STM32U5 created via API". Paste the object into the example replacing the sample object with your project id, then click TRY.
{"project": "<your_project_id>","name": "stm32u5 Created via API","flavor": "stm32u5-b-u585i-iot02a","description": "STM32U5 IoT Discovery Kit","model": "b-u585i-iot02a","os": "1.1.0"}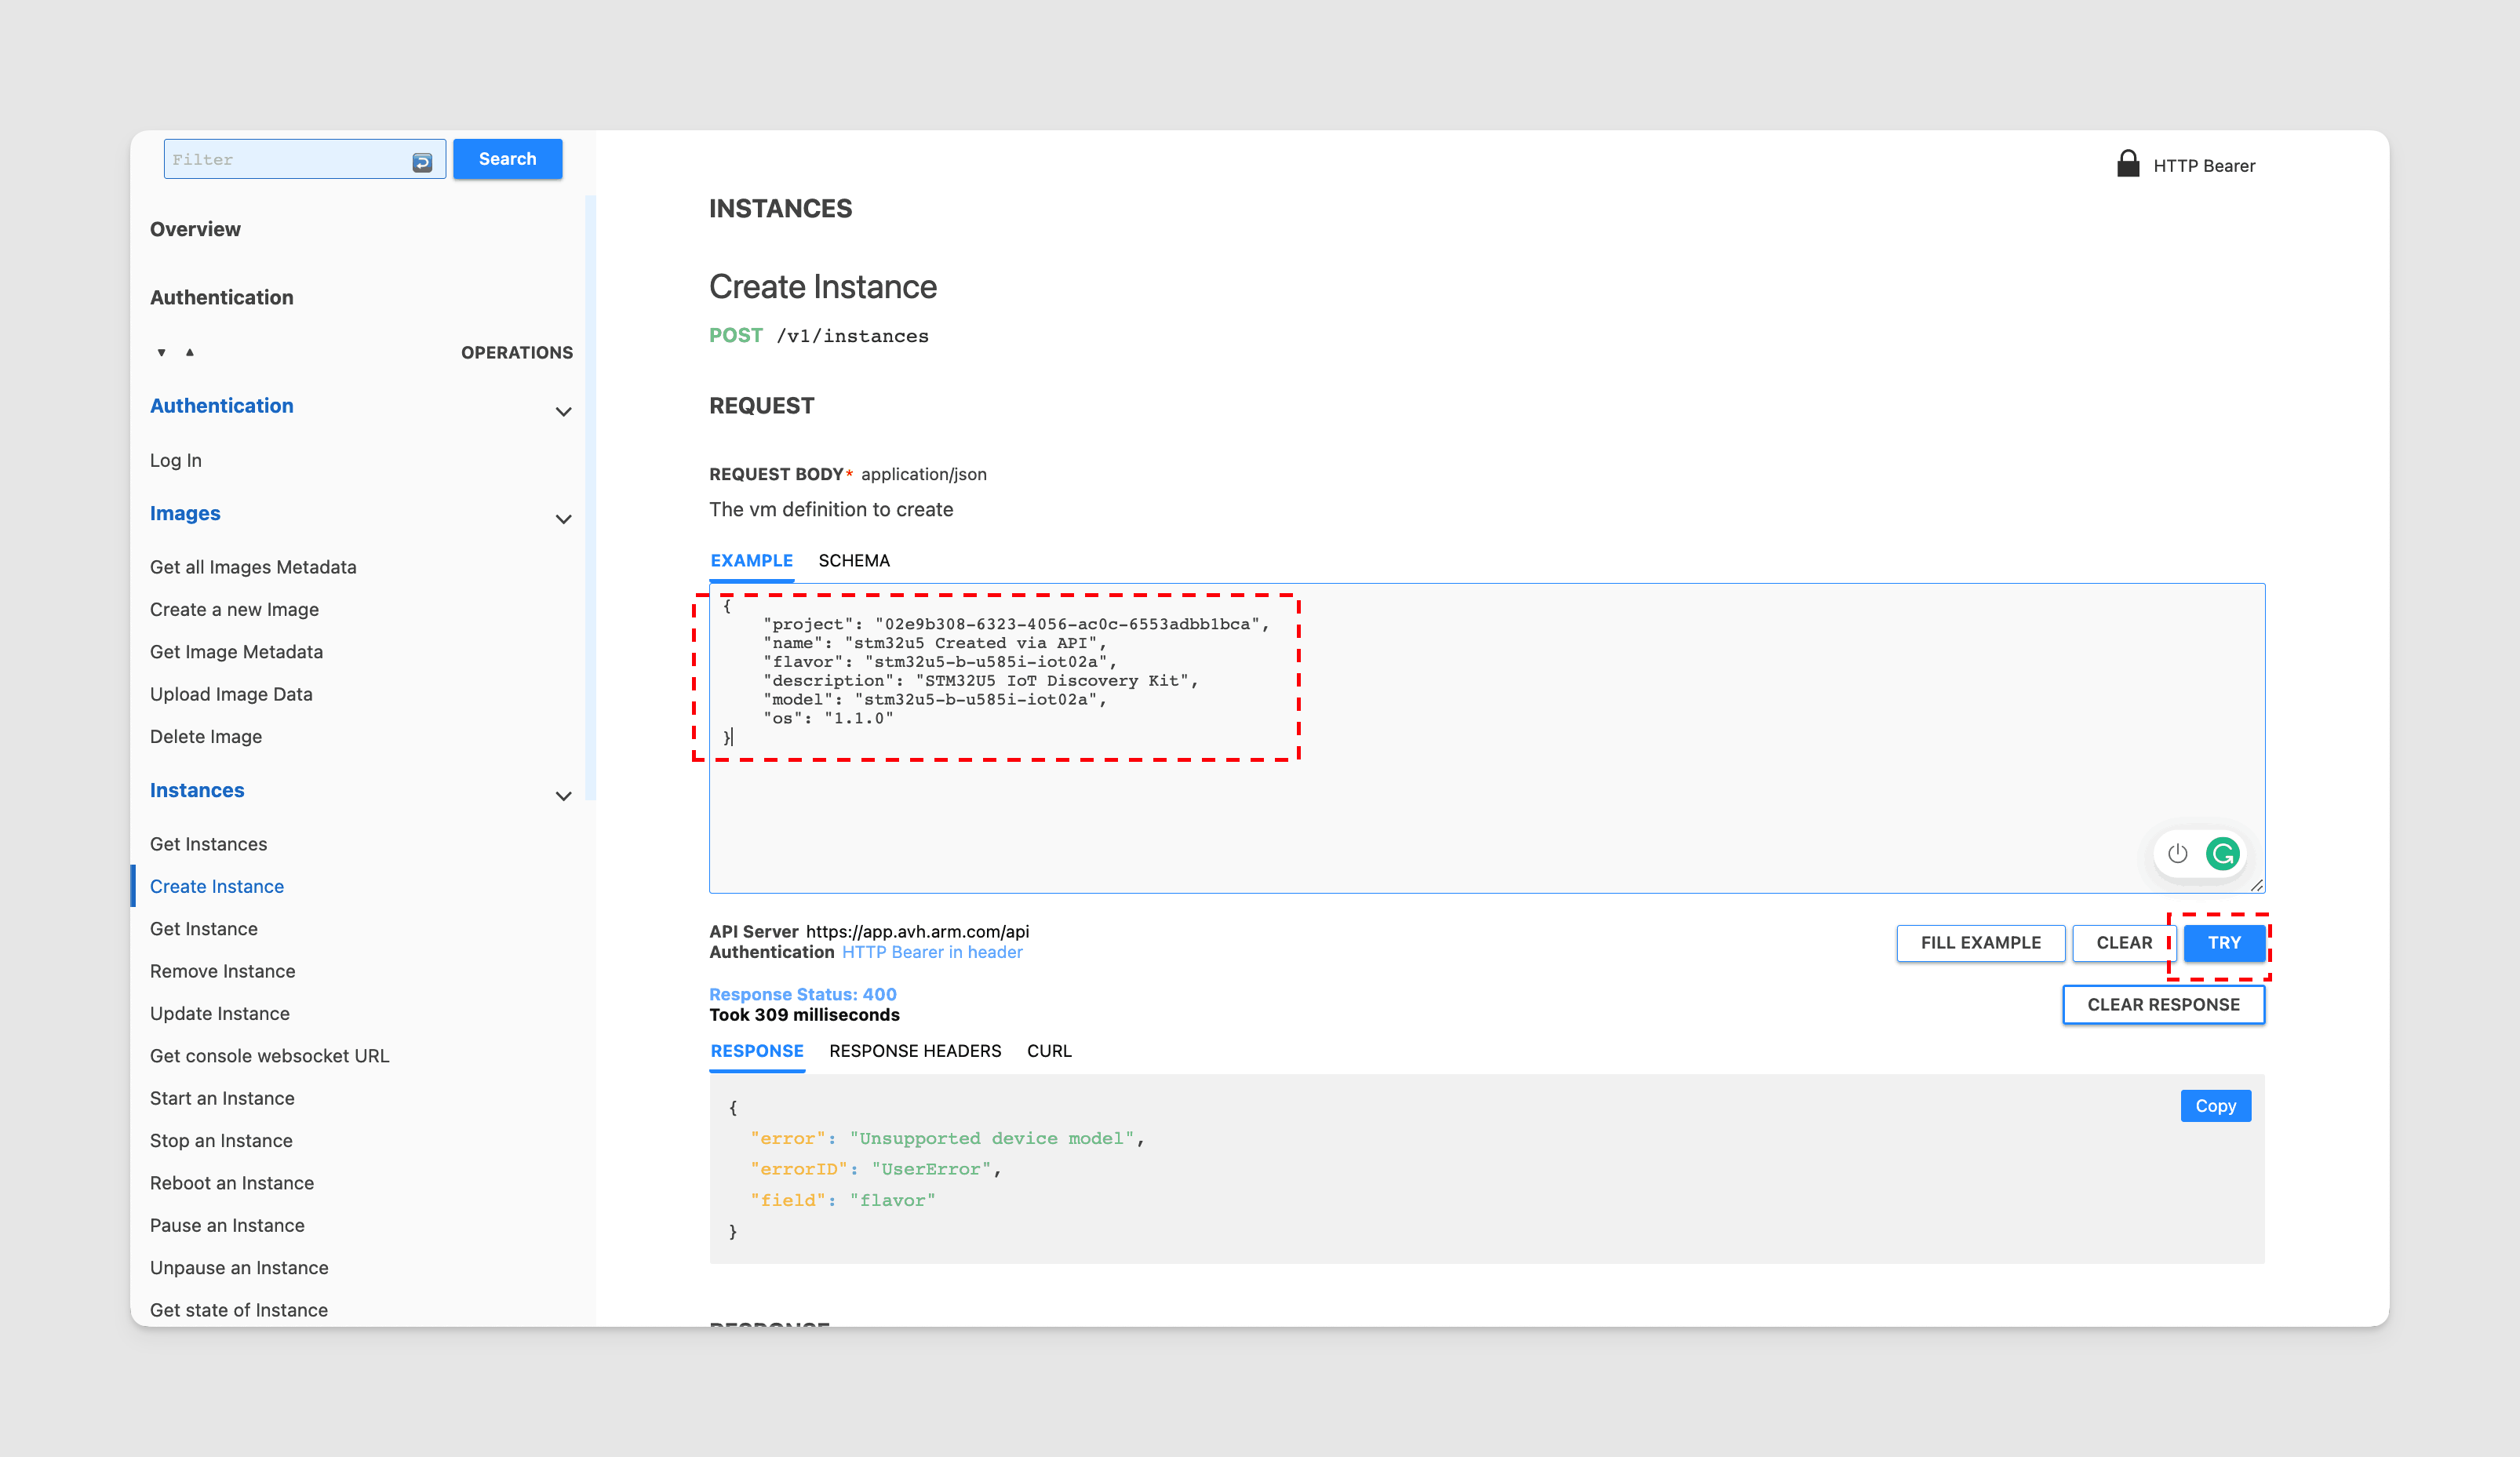 note
noteYou can find information about the models and the software for the models in the API Doc
-
The response will show that the device is being created.
-
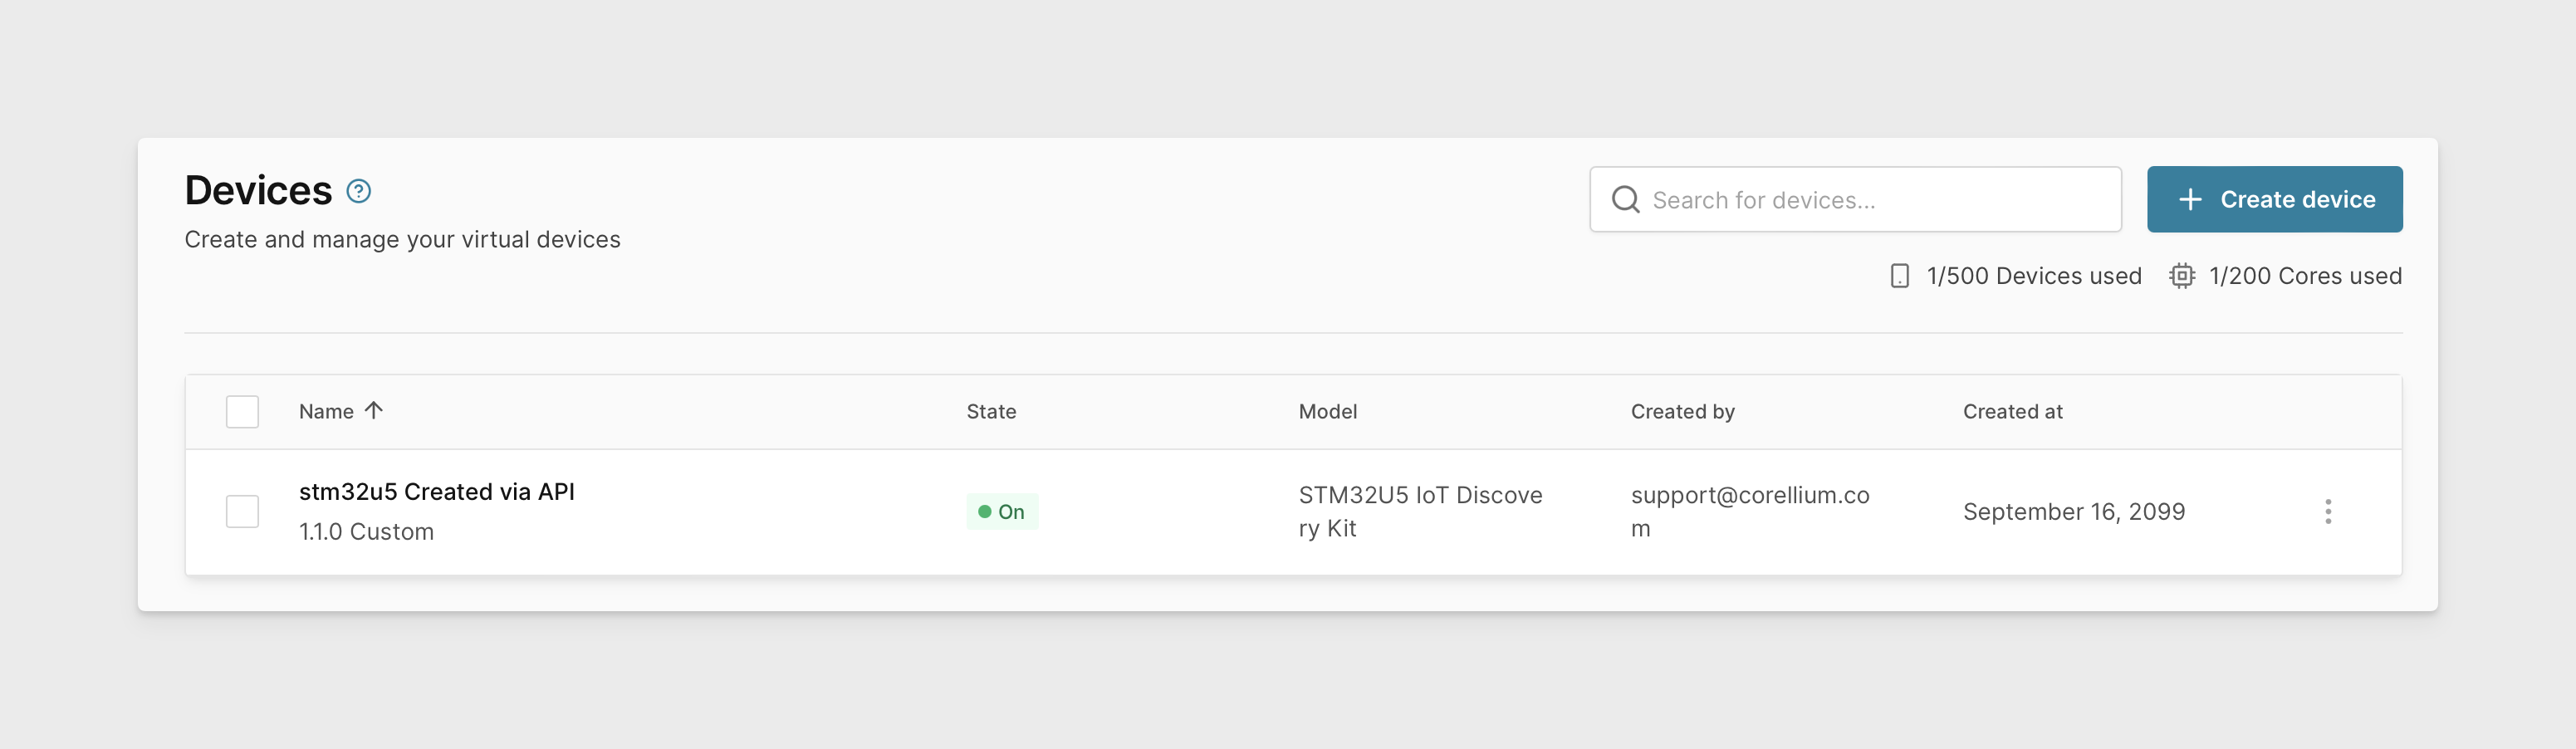
When you go back to your AVH devices list on the web interface, you should see the newly created device.